Customer satisfaction is primary when you wish to run an ecommerce store successfully.
Among the many things that may help your customer like your store is product details. Customers want descriptive details about the product as it helps them decide whether to buy or not. Limited information about a product can potentially turn a customer away.
This topic is a part of Product Management Series in Magento 2. You can jump on to the other parts here:
- How to Add New Category and Product in Magento 2
- How To Add Grouped Products in Magento 2
- How to Create Coupon Code in Magento 2
- How to Add YouTube Videos on Product Pages in Magento 2
- How to Create Configurable Product in Magento 2
- How to Create a Bundle Products In Magento 2
For this purpose, I am going to teach you how to add a custom tab in Magento 2 for product details.
Add New Attribute and Add Attribute Set
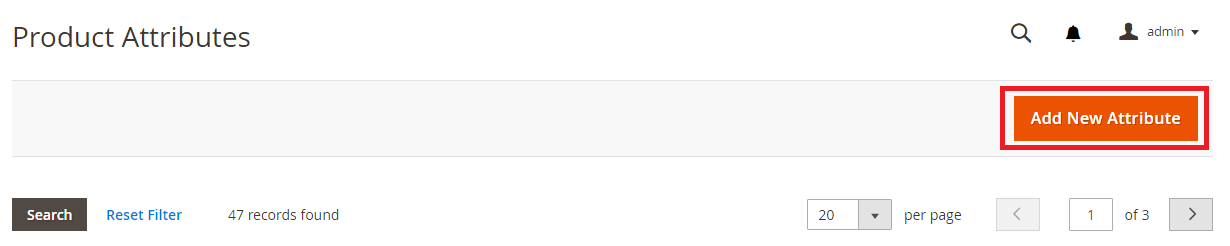
Open the admin panel of your Magento 2 and go to Stores → Product and click on Add New Attribute button.
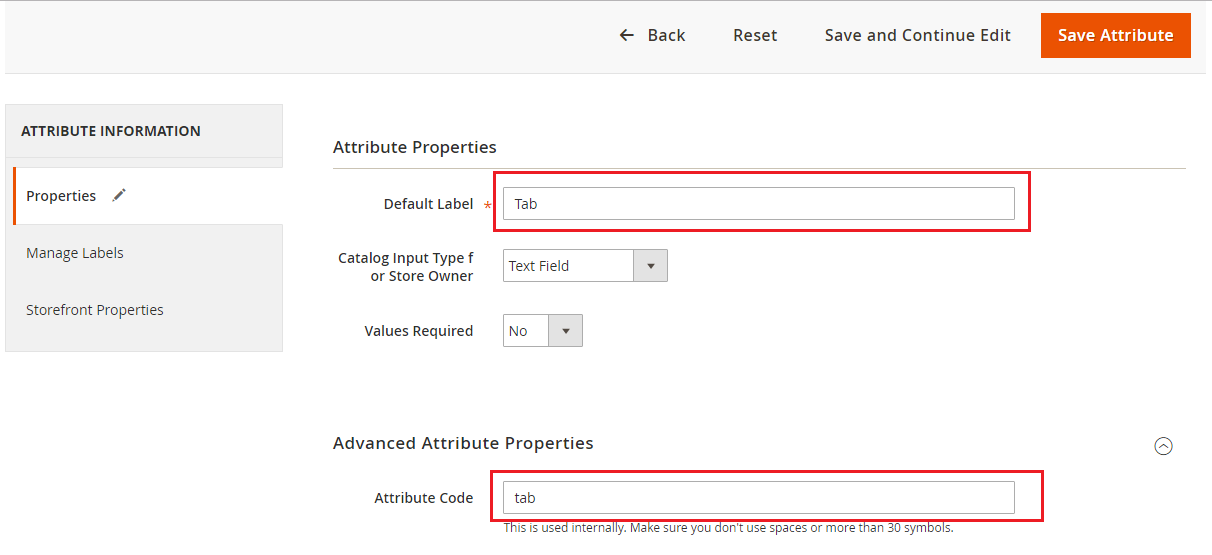
Now insert the details of Attribute. Set the Default Label as Tab and Attribute Code as tab. Now just click on Save Attribute.
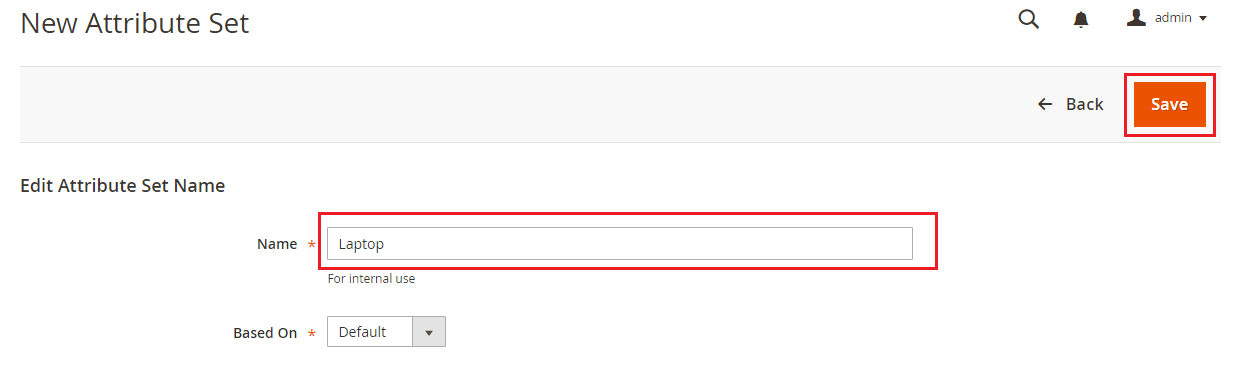
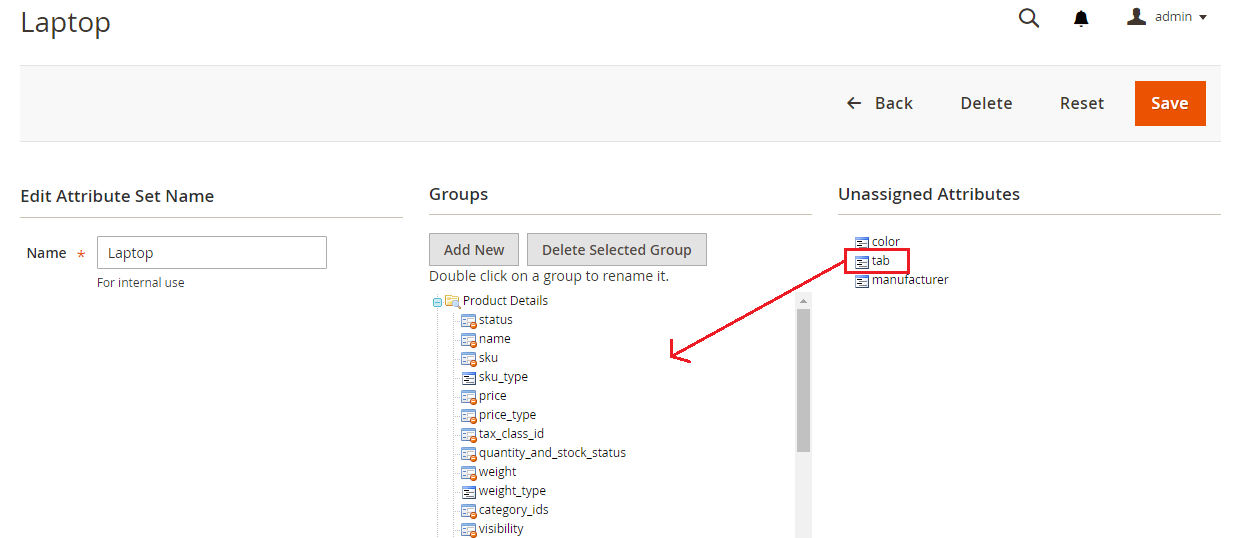
Go to Stores → Attribute Set and then click on Add Attribute Set.

Insert Laptop as the name of Attribute Set and click on Save.
Now move tab from Unassigned Attributes to Product Details and click on Save.
Product Page Configuration
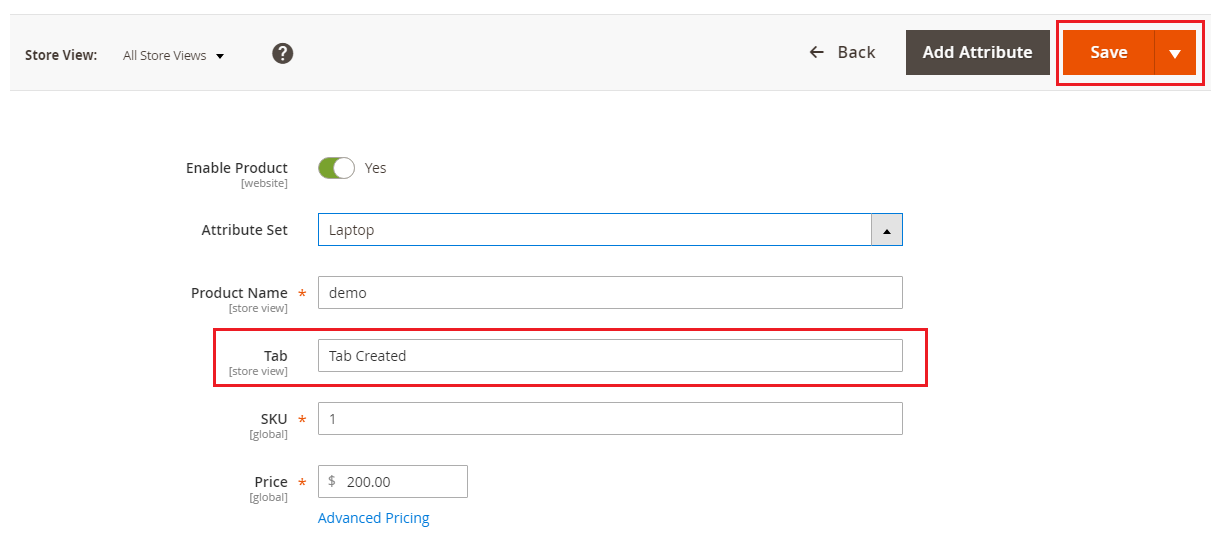
Open the product edit page from the admin panel of your store and select Laptop from the Attribute Set drop down.
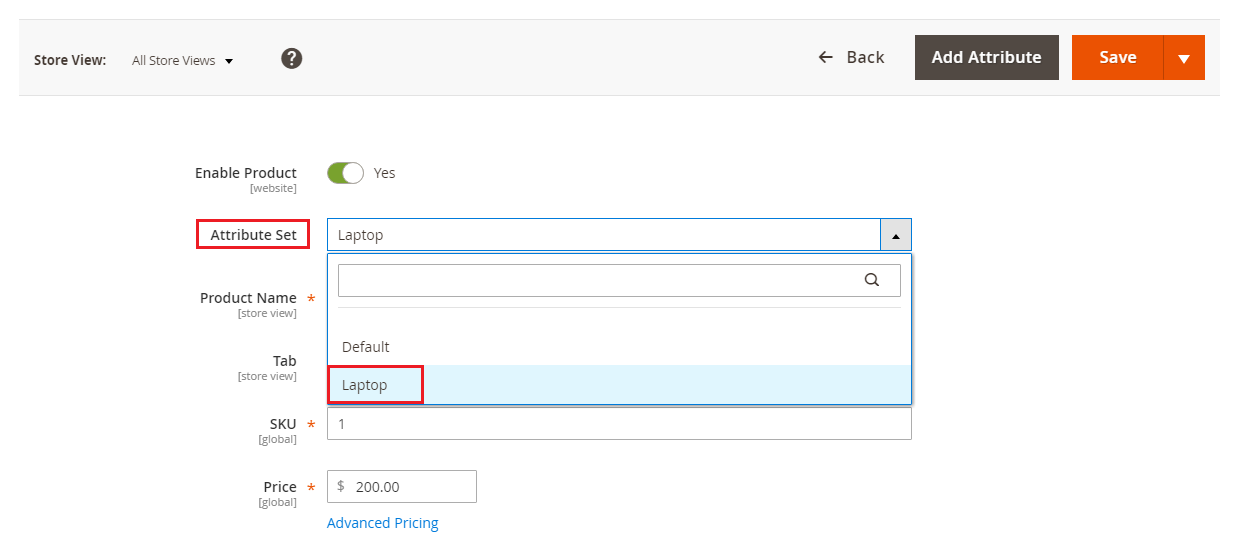
Scroll down the product edit page and you will see a new text field Tab. Add Tab Created in this text field and click on Save.
Create Module
Now I am going to create a custom module. If you don’t have any knowledge on how to create one, you can check this step-by-step guide: How to Create Module in Magento 2.
Configuration of Module
Create module.xml file in app/code/Magenticians/Mymodule/etc and paste this code in it:
<?xml version="1.0"?>
<config xmlns:xsi="http://www.w3.org/2001/XMLSchema-instance" xsi:noNamespaceSchemaLocation="urn:magento:framework:Module/etc/module.xsd">
<module name="Magenticians_Mymodule" setup_version="2.0.0" />
</config>
Registration of Module
Create registration.php file app/code/Magenticians/Mymodule and paste this code to it:
<?php
\Magento\Framework\Component\ComponentRegistrar::register(
\Magento\Framework\Component\ComponentRegistrar::MODULE,
'Magenticians_Mymodule',
__DIR__
);
Create Frontend Layout File
Create catalog_product_view.xml in app/code/Magenticians/Mymodule/view/frontend/layout and add this code to it:
<?xml version="1.0"?>
<page xmlns:xsi="http://www.w3.org/2001/XMLSchema-instance" xsi:noNamespaceSchemaLocation="urn:magento:framework:View/Layout/etc/page_configuration.xsd">
<body>
<referenceBlock name="product.info.details">
<block class="Magento\Catalog\Block\Product\View" name="tab.tab" template="Magenticians_Mymodule::extra_tab.phtml" group="detailed_info" >
<arguments>
<argument translate="true" name="title" xsi:type="string">Extra Tab</argument>
</arguments>
</block>
</referenceBlock>
</body>
</page>
Create Template File
Create extra_tab.phtml file in app/code/Magenticians/Mymodule/view/frontend/templates and paste this code in it:
<?php

$product = $block->getProduct();

?>

<h1 style="color: #ff6e17"><?php echo $product->getData('tab'); ?></h1>
Let’s move on to running commands now.
Note: All of the following commands will have to be run in the root directory of your Magento 2.
Run this command now:
php bin/magento module:status
If you found the module in the disabled list, then you have to enable it by running the following command:
php bin/magento module:enable Magenticians_Mymodule
Lastly, just run all these commands:
php bin/magento setup:upgrade
php bin/magento cache:clean
php bin/magento cache:clean
Open the product page of your store and you will see the custom tab on it:

Make Unlimited Customizations to Your Magento Store.
With Cloudways, Deploy Your Magento Store in Minutes and Add as many Customizations to it as you want.
Conclusion
To sum things up, descriptive details about the products you sell is necessary to make your online store a success. Hence, after following this simple tutorial, you should be able to add custom tabs in Magento 2 product page, which will allow your visitors to make up their mind about purchasing an item easily. If you have any confusion or want to add something to the tutorial, use the comment section below and be heard!


