Articles 
Install Magento 2 On Debian 9 Digital Ocean Server from Scratch
- Syed Muneeb Ul Hasan
- March 18, 2020
Unless you are a professional Magento developer, installing Magento 2 on your unmanaged cloud server from scratch will be an arduous task. Not only it is time-consuming, but there are tons of errors during the installation that will pop up from time to time and make your installation process unbearable.
To avoid you from the constant headache, puffy eyes due to a lack of sleep, and regret for not having a Magento expert. We have prepared this detailed guide to install to host your ecommerce store on a server of DigitalOcean Magento 2.
We know that to install Magento 2 on Debian 9 from scratch on your server is filled with pain. And, we are here with a complete tutorial that will guide you throughout the process like a professional Magento expert so that you can install the platform without worry.
Let’s get started.
Requirements to Install Magento 2 on Debian 9 using DigitalOcean Server
- 4GB of Storage
- 2GB of RAM
- Any Cloud Server of Your Choice
- Debian OS – We will be using Debian 9
But the question is why should anyone choose cloud solution over other hosting solutions?
Cloud Vs Other Hosting Solution
Mostly, people go with shared hosting due to the low cost but it would affect the store performance, security and other factors. On the other hand, we have dedicated server hosting which is good in terms of performance but if anything happens with the dedicated server then the business has to suffer in the end.
Now Cloud hosting is the best solution we are left with, which offers the best mix of performance, resource availability and scalable infrastructure to scale the server resources when needed.
Why Choose DigitalOcean As Your Cloud Hosting Partner?
Optioning DigitalOcean will create an opportunity for you to extensively scale your online business which is capable enough to run parallel across multiple cloud servers without compromising on performance.
On top of that, DigitalOcean provides a simplified cloud web structure for software developers and it is reliable, economical and highly scalable. If we talk about the fact, launching and setting up the Magento DigitalOcean server is a bit difficult, but Cloudways simplifies it with-in a few clicks.
Cloudways platform allows you to host PHP based websites like Magento on DigitalOcean infrastructure and also look after the DigitalOcean update packages.
Here are some conclusive reasons to choose a DigitalOcean Magento cloud infrastructure:
Professional Documentation
The best way to grasp the knowledge of any product is through the official documentation, that’s what DigitalOcean offers to their users. DigtalOcean’s documents are comprehensive and concrete which includes tutorials, installation guides and walkthroughs.
Affordable Pricing
The basic DigitalOcean pricing plan starts at $5/mo and the choice of hourly and monthly options makes it more affordable for the individual developers and startups.
Active Community
By leveraging the DO community, you can communicate with a bunch of people to know more about cloud server and also get the answer to all your queries from experts.
Remarkable Performance
DO offers high server speeds and SSD hard drives along with high performance bandwidth. Moreover, it also offers:
- DigitalOcean provides Dedicated IP addresses.
- Multi-factor authentication
- Easily resize the nodes.
- Data centers across popular geographical locations
Installing LAMP Debian 9 on DigitalOcean Server
Before we start installing Magento on DigitalOcean, we will have to install LAMP on Debian. Why LAMP? Because…
L = LINUX
A = APACHE
M = MYSQL OR MARIADB
P = PHP
You need to install these on your Magento DigitalOcean server otherwise Magento will simply not work. So, in this article, I will show you how you can easily setup a LAMP on your DigitalOcean cloud. For this tutorial, I suppose that you have already setup your server with Debian OS 9.
Connect with the Debian 9 DigitalOcean Magento Server
Install Putty or another SSH client and then connect to the command line console.
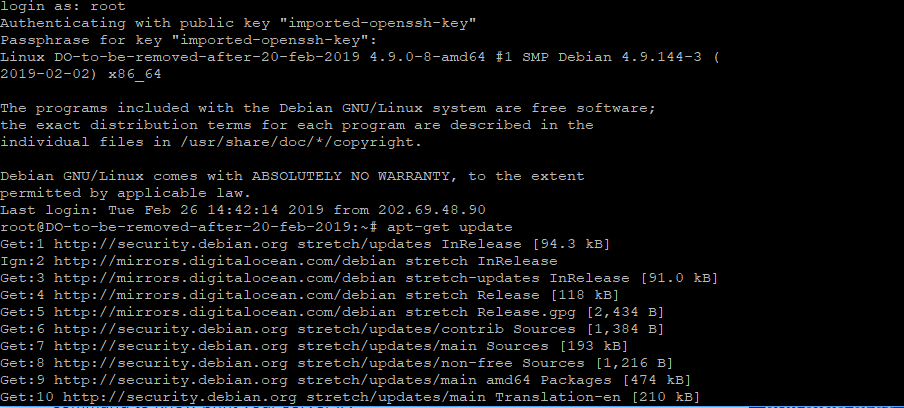
Next, update the packages.
We will use the following command to update packages
apt-get update
It will update the packages on DigitalOcean Magento 2 server.
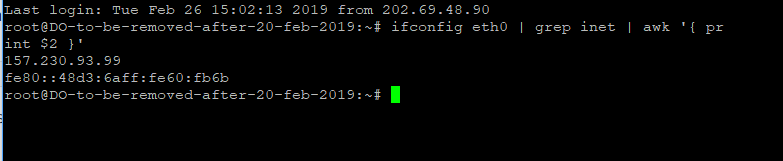
We will assume that you already have your IP address. However, if you don’t have the IP address available then you can use the following command:
ifconfig eth0 | grep inet | awk ‘{ print $2 }’
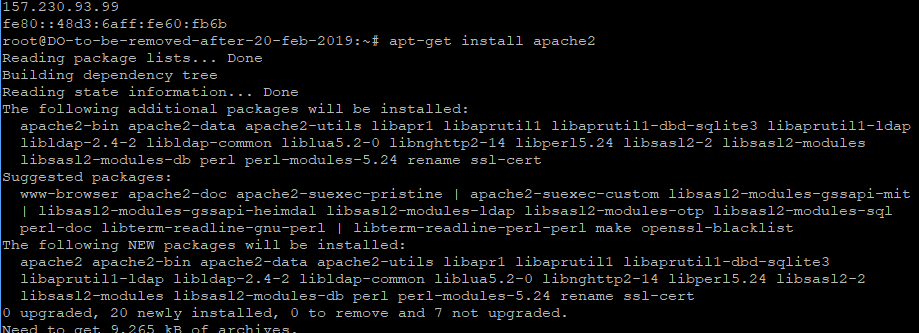
Installing Apache2 on Debian 9 DigitalOcean Magento Cloud Server
Apache is a PHP web server that runs almost 50 percent of the websites. It is an essential component for installing PHP and then Magento. So, you have to run the following command to install Apache 2 on Debian server:
apt-get install apache2
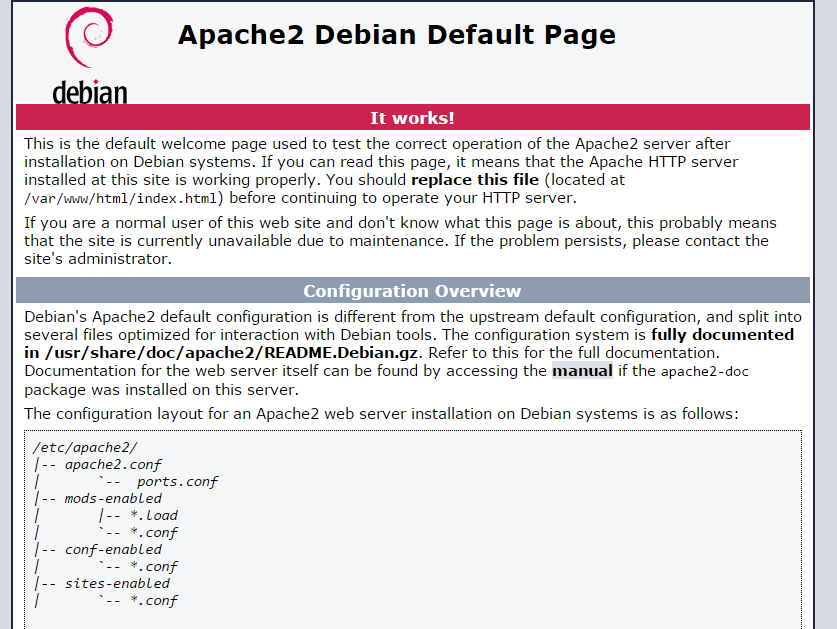
Once the download is completed you will see the Apache loading page on the IP address. http://xxx.xxx.xxx.xxx
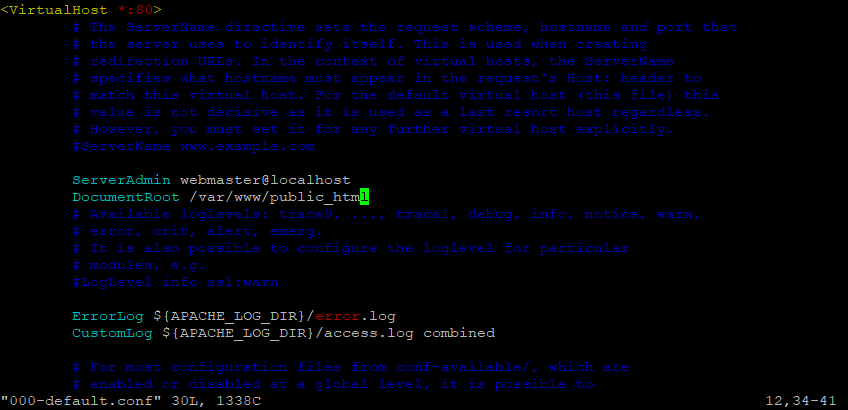
Apache will create a default file path ‘/var/www/html’ on your server. You will have to rename this file to public_html. To change the filename, open 000-default.conf file with the vim command.
vim 000-default.conf
Now press ‘i’ to edit the file.
You will have to change the ‘DocumentRoot /var/www/html’ to ‘DocumentRoot /var/www/html’
Once done, press ESC to exit the file. Now, save it by typing ‘:wq’ in the console.
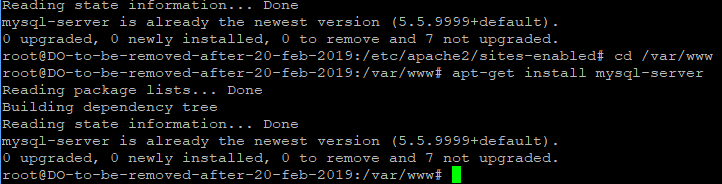
Now, change the folder name from ‘html’ to ‘public_html’ with the following command:
cd /var/www
By typing the above command you can enter ‘www’ directory. Now, rename file.
mv html public_html

Now restart the apache2 digital ocean server by typing the following command:
service apache2 restart
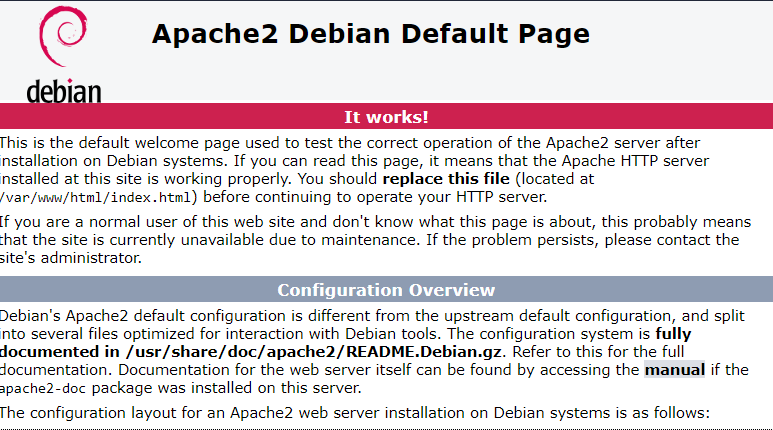
Go to IP address and check the settings. They will be changed.
Installing MySQL on Debian 9 Magento DigitalOcean Dedicated Server
Next, we will install MySQL on Debian DigitalOcean dedicated server. MySQL is required for databases and Magento will not work with installing it on your server.
In your terminal, type the following command:
apt-get install mysql-server
Once the installation is finished, it will ask you to set your root password.
Once you hit enter, the prompt will ask you to enter the root password again, then hit enter.
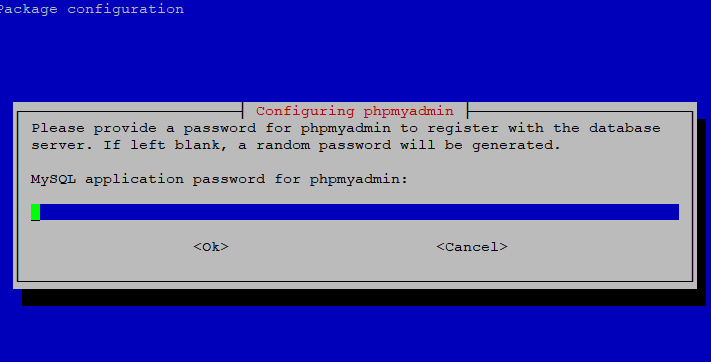
By default, there is no password on MySQL.
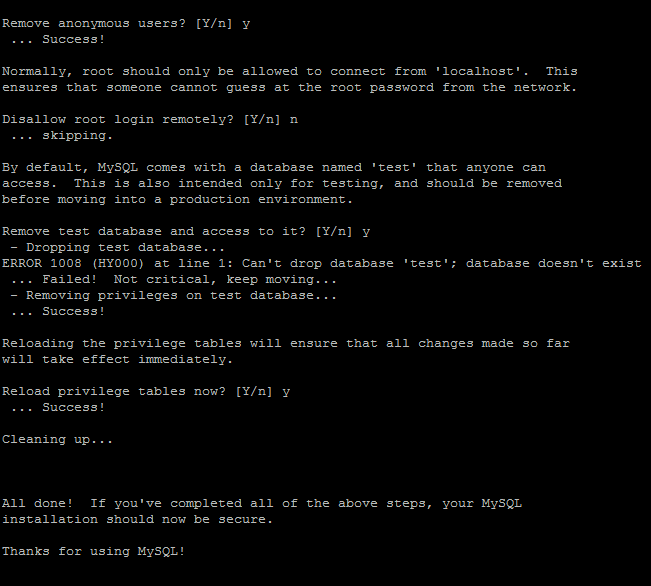
Go through the prompts.
- Press N if you don’t want to change the root password.
- Next, press Y if you want to remove anonymous users.
- Now, press N if you want to disallow root login remotely and hit enter.
- If you want to remove test tables and databases press Y and hit enter.
MySQL will now install successfully on your DigitalOcean dedicated cloud server.
Install PHP 7.1 on Debian 9 DigitalOcean dedicated server
We will install the latest version of PHP on the server. Here is how to do that.
First, upgrade your server packages.
sudo apt update
sudo apt upgrade
Next, install PHP 7.1.
sudo apt-get install php7.1
Now install modules specific to PHP 7.1.
sudo apt-cache search php7.1
You can install all PHP 7.1 module by this one command
sudo apt-get install php7.1 php7.1-cli php7.1-common php7.1-json php7.1-opcache php7.1-mysql php7.1-mbstring php7.1-mcrypt php7.1-zip php7.1-fpm
Now, edit the PHP.ini file in the Apache 2 folder.
sudo nano /etc/php/7.1/apache2/php.ini
Change the following settings in the PHP.ini file so that Magento can easily install on your DigitalOcean cloud.
file_uploads = On
allow_url_fopen = On
memory_limit = 256M
upload_max_filesize = 100M
max_execution_time = 360
date.timezone = America/Chicago
Now restart the server to complete the PHP installation process.
service apache2 restart
Change the directory to public_html folder of Apache by typing the following command.
cd /var/www/public_html
Now edit the index.php file by typing…
vim index.php
Press ‘i’ to enter the file editing mode. Now, type:
<?php echo phpinfo();?>
Now open your file through the browser to see if it works. It will show the PHP information.
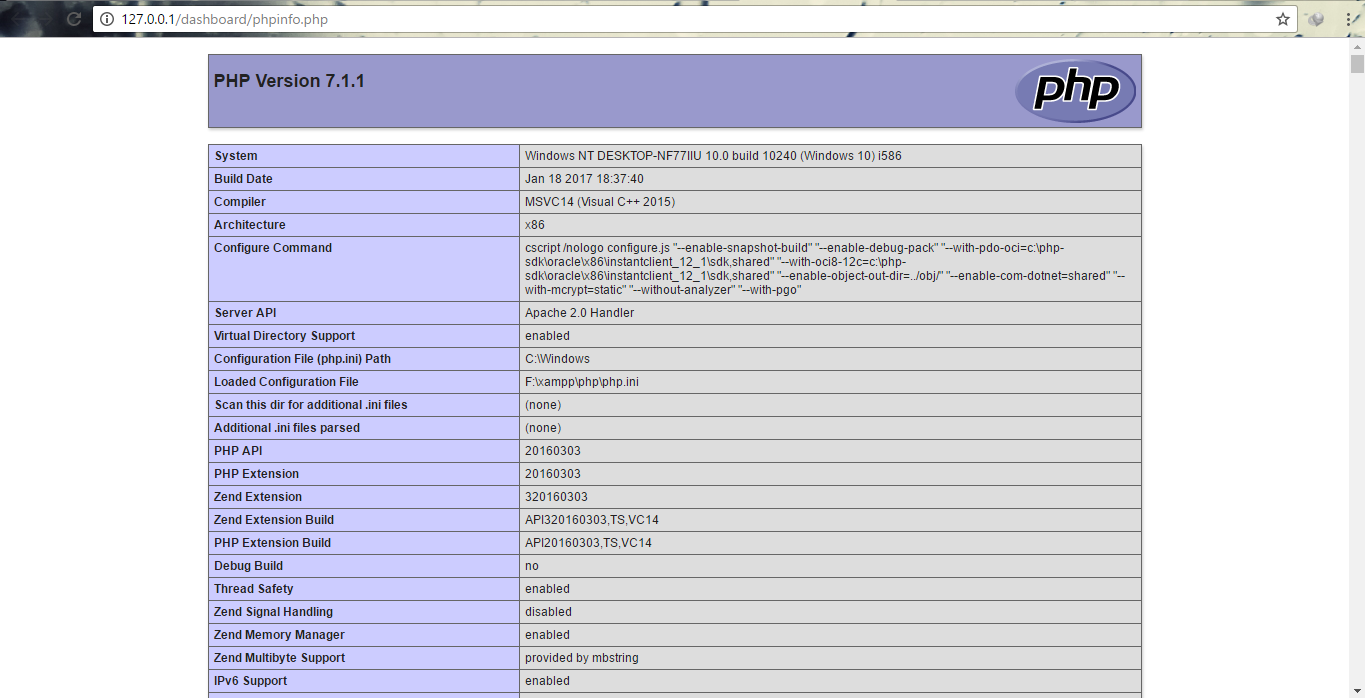
If you see something similar in the PHP folder, then you are successful.
Install PHPMyAdmin on Debian
Next, you will have to install the PHPMyAdmin interface to manage the database. Type the command:
apt-get install phpmyadmin
Now, install the Mcrypt module for PHP.
apt-get install mcrypt
The mcrypt module will come in handy when we start installing Magento.
By default, PHPMyAdmin is installed in /usr/share/phpmyadmin. You need to create a symlink inside the public_html folder for this purpose. Let’s build the symlink by entering the following commands.
cd /var/www/public_html
ln -s /usr/share/phpmyadmin
Open YOURIPADDRESS/Phpmyadmin from your browser to check if PhpMyAdmin symlink is created.
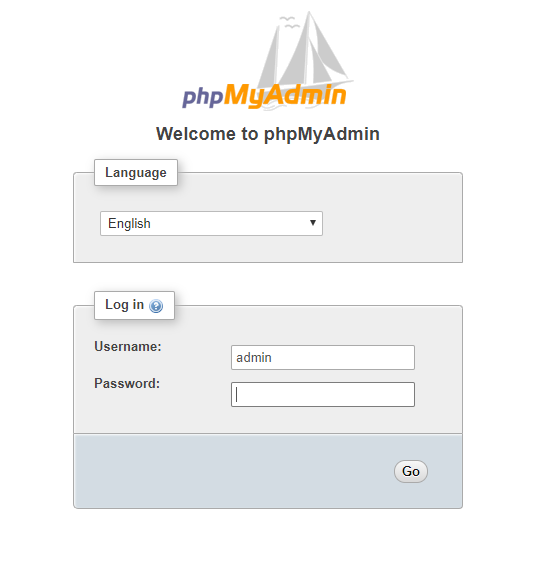
The following page shows that the symlink is successfully created.
Now, let’s secure our server so that no other IP address can access the database.
Enable IP Access to PHPMyAdmin
We will add the instruction to .htaccess file so only our IP address can access the PHPMyadmin from the browser.
vim .htaccess
Press ‘I’ to edit the file and enter the following details.
order allow,deny
allow from <your server ip>
Press ESC and then press ‘:wq’ to save the .htaccess file.
Now only your IP can make changes to the server.
Install GIT to Debian DigitalOcean Dedicated Server
Next, we will install GIT to the server using the command…
sudo apt-get install git-all
php -r “copy(‘https://getcomposer.org/installer’, ‘composer-setup.php’);”
php -r “if (hash_file(‘sha384’, ‘composer-setup.php’) === ’48e3236262b34d30969dca3c37281b3b4bbe3221bda826ac6a9a62d6444cdb0dcd0615698a5cbe587c3f0fe57a54d8f5′) { echo ‘Installer verified’; } else { echo ‘Installer corrupt’; unlink(‘composer-setup.php’); } echo PHP_EOL;”
php composer-setup.php
php -r “unlink(‘composer-setup.php’);”
If, for some reason, the above code doesn’t work, then check the official website link for details.
That’s part one of the tutorial. Now, let’s move to the next part i.e. Installing Magento on Debian 9.
Install Magento 2 on Debian DigitalOcean Server
Before installing Magento 2 to the DigitalOcean dedicated server, you need to create a database.
First, log into the MySQL database.
mysql -u root –p
You need to create a database in the MySQL folder. This database will be connected with data provided by Magento.
create database mage2_db;
Note: You can change the name of the database from mage2_db to any other name of your choice.
Create a user account
If you have not already created a user account on MySQL, you can create one using the commands provided below.
create user ‘mage2_user’@’localhost’ identified by ‘user1’;
Next, grant this user full privileges on the database.
GRANT ALL PRIVILEGES ON mage2_db . * TO mage2_user @localhost;
If you already have a user available such as ‘root’ you can also grant it complete privileges on the user.
Flush Privileges so that MySQL knows about the privileges granted to the user.
FLUSH PRIVILEGES;
That’s it. You have successfully created the database. Now, let’s install Magento 2 on DigitalOcean server.
First, locate the URL where Magento 2 is available for download.
We have found one resource from where you can download Magento 2. https://github.com/magento/magento2/archive/2.1.0.zip
We will use the wget command to download this file to Github. Here is how it works.
cd /var/www/public_html wget https://github.com/magento/magento2/archive/2.1.0.zip
The ‘cd /var/www/public_html’ is the path where website data is available.
Now, extract the file with the following command.
unzip 2.1.0.zip
Note: If the unzip command doesn’t work, then you need to install the package to your system.
sudo apt-get install zip – Not necessary if you are just unzipping the file, but you can install it anyway.
sudo apt-get install unzip
This is the package required to unzip files.
Now, unzip the Magento package.
Installing Magento
To install Magento from the composer type:
Composer install
If it gives an error, then install the packages that the Magento installation requires.
While we were installing Magento on DigitalOcean Debian server, we were short of three PHP packages.
Here is one of the errors:
Problem 1
The requested PHP extension ext-mcrypt * is missing from your system. Install or enable PHP’s mcrypt extension.
We solved it by adding mcrypt package to PHP with the following command:
sudo apt-get install php7.1-mcrypt
Note:
Change the PHP version name to the one that you already have installed.
After this, change the value of “always_populate_raw_post_data = 0” to ‘–1’ in your PHPini file.
To edit the PHPini file, use the following commands:
cd/etc/php/7.1/apache2/php.ini
vim php.ini
Change the always_populate_raw_post_data value to ‘-1’
To exit the file, press ESC. Now, save it by typing ‘:wq’.
Now, update composer with the following command:
composer update
That’s it. You have successfully installed Magento on DigitalOcean server.
Where is Magento Installed on DigitalOcean Debian server?
Most of the times, the Magento folder is created with the zipped file name. Magento is installed in it.
To check where Magento is installed on the server, press ‘ls’
You will get a list of files and folders. Open the folder that has the exact name as the file that you recently unzipped to install Magento.
To open Magento installation on a browser, use your IP ADDRESS/FOLDERNAME
You can move the data in that folder to the main installation with the following command:
mv ~/var/www/public_html/Magento* ~/var/www/public_html
Now, open your IP address in the browser to check if Magento is moved to the main folder.
Next, you need to assign ownership of all Magento files to Apache folder.
sudo chown -R www-data:www-data /var/www/public_html/
Setting up Magento Frontend
When you open the IP address, you will see the Magento setup button on the front page
Press ‘Agree and Setup Magento’ to start the setup process.
Next, Magento will ask you to test the Readiness check to make sure that you have all the files installed properly.
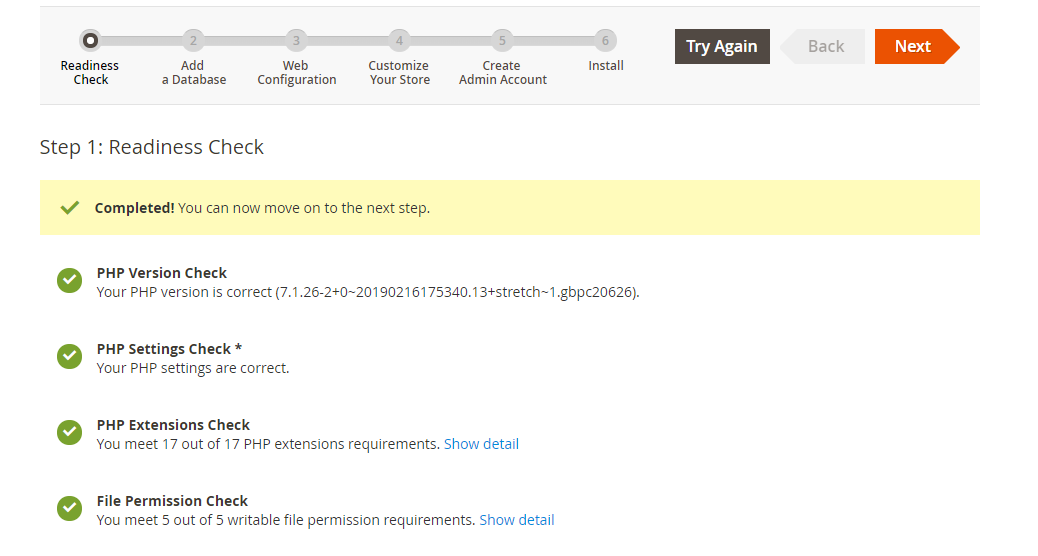
As you can see that readiness check has confirmed that all settings are proper. We can now start setting up Magento databases.
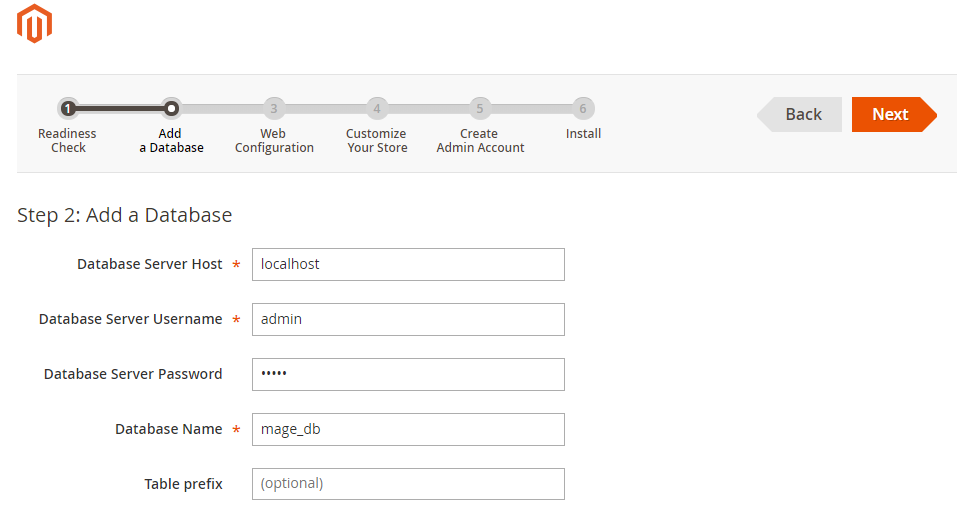
Add the user details that you created earlier. Next, add the database name in the ‘Database name’ tab.
Press Next.
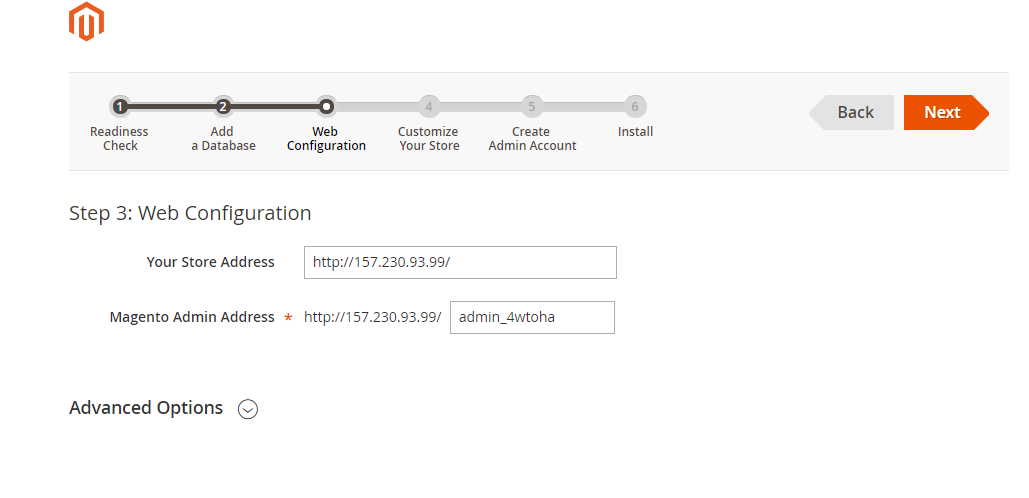
Your store IP will be shown here. You can change the admin address of the Magento folder. Make it something that only you can remember.
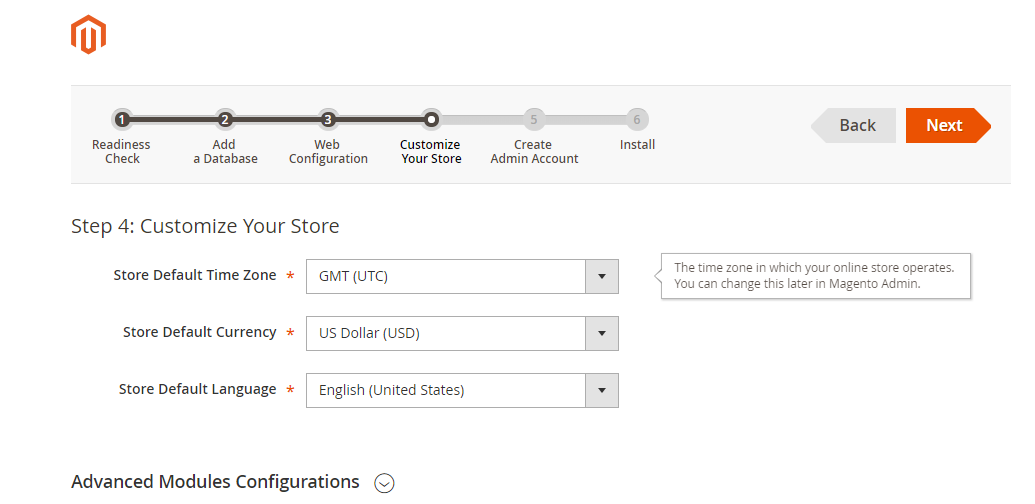
Next, change the currency settings for your store.
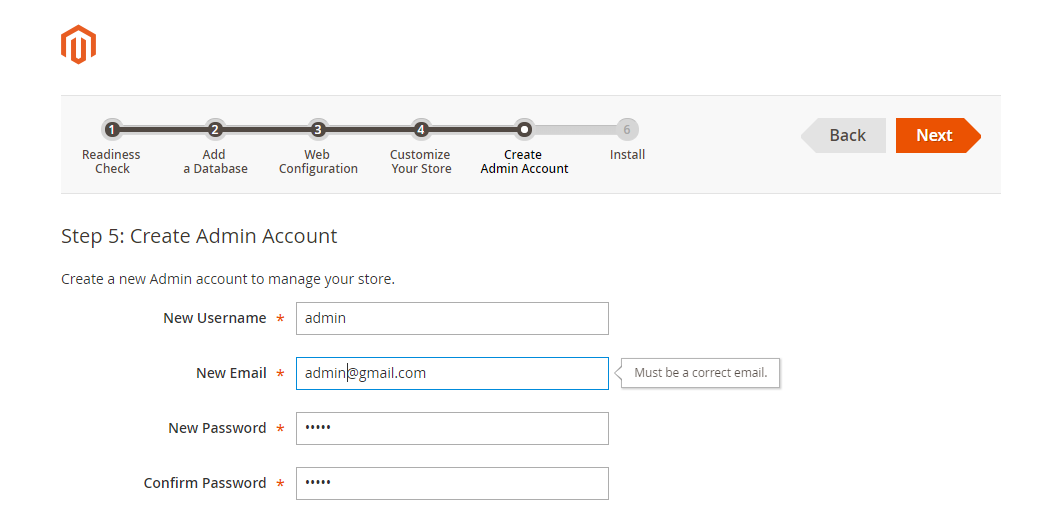
Next, create an admin account on the Magento ecommerce platform.
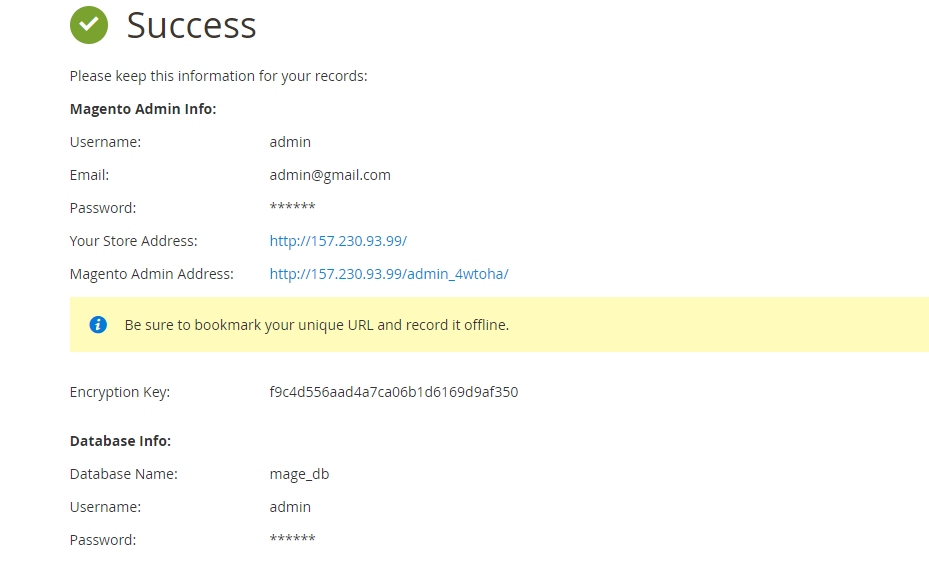
That’s it, Magento is successfully installed on your system.
An Alternative Option – Magento with Managed DigitalOcean Cloud Hosting
Phew… that was tiring. Let’s see if there is a better and easier way available.
Deploying Magento with a Single Click
While having your own cloud and installing Magento ecommerce platform on it is great, if you are doing it for the first time. And, I also recommend it. But, think about it. Installing a DigitalOcean Magento 2 server is not the wisest, and the most efficient solution available. In fact, you can deploy Magento with just a single click with managed cloud hosting solution.
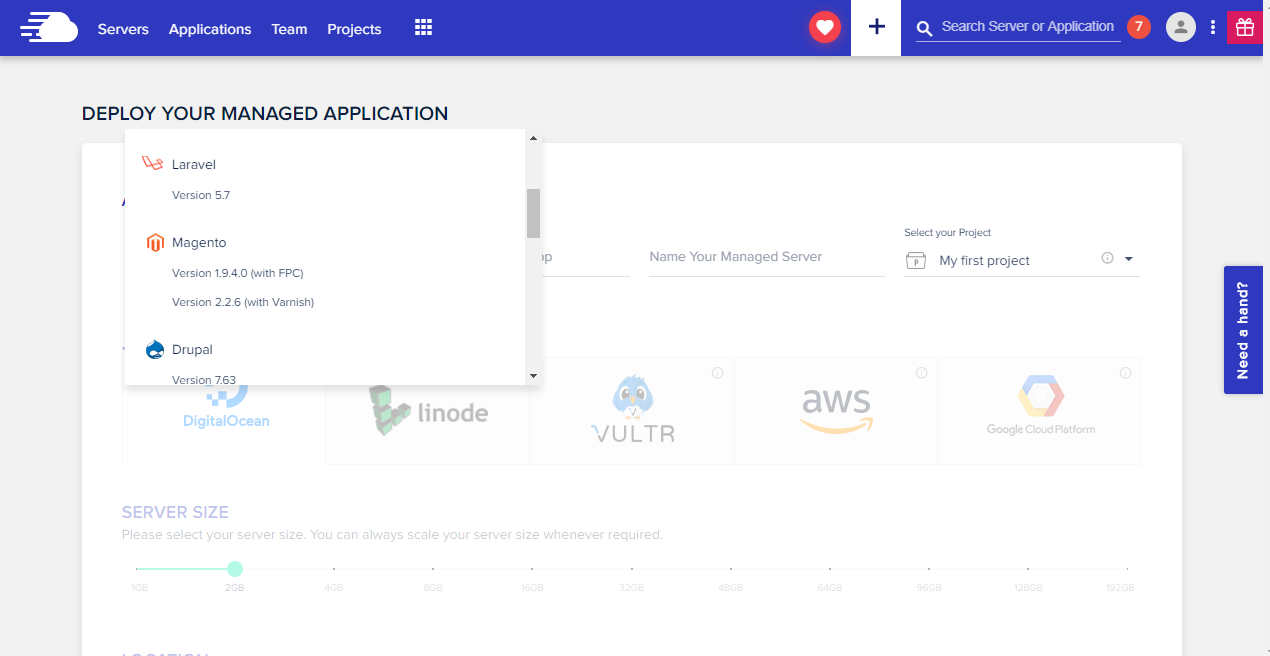
Let’s see how you can do that with Cloudways Managed Magento hosting.
Launching a Cloud Server with a Single Click
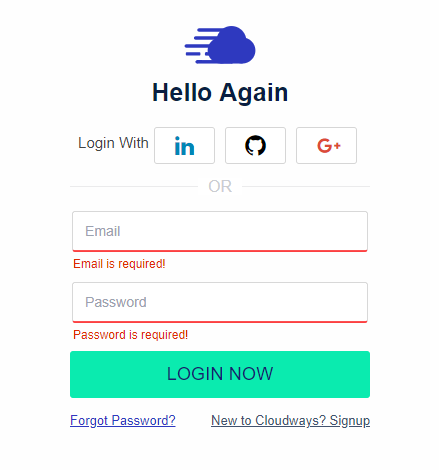
First, create an account on Cloudways. Once you have the account setup, launch your first server on the platform.
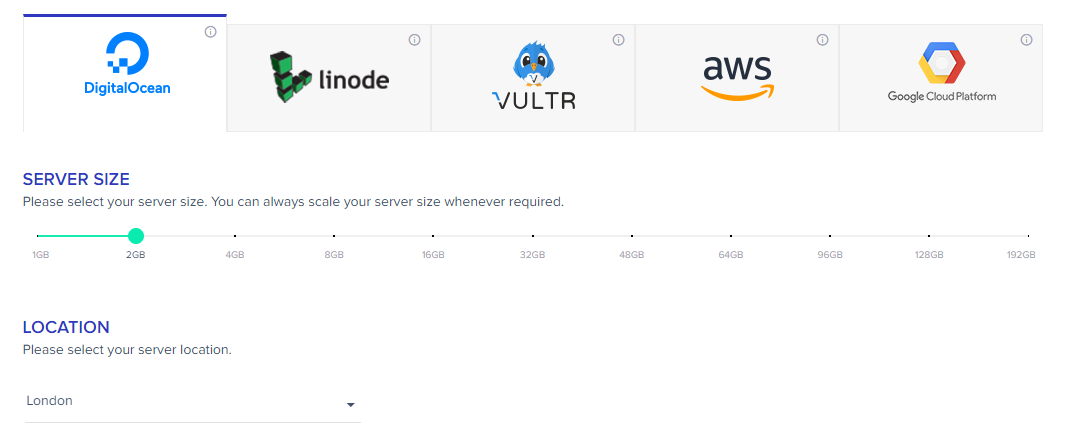
The best part about using Cloudways is that you get to choose from five different cloud hosting providers including AWS, Google Cloud, DigitalOcean, Linode, and Vultr.
Launch Your Magento Server
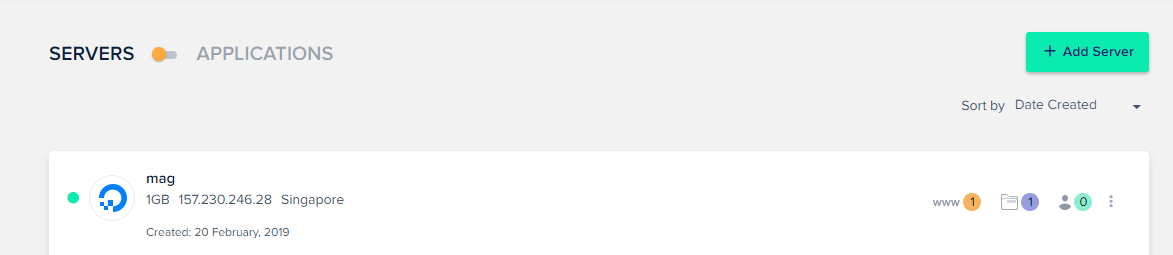
You can easily launch Digital Ocean on Magento within few seconds.
Next, select the location of the server that you want to launch and that’s it. You are done.
Easy right?
That’s the beauty of using a managed cloud hosting solution for your Magento ecommerce store. No errors. No waste of time. No hassle. And, most importantly… no stress.
Ready to host your Magento store on Cloudways?
Cloudways is offering FREE $25 hosting credit on using Coupon Code: MGT25.
Bottom-line
There you go. We have provided you the complete tutorial about how to launch DigitalOcean Magento server on Debian environment. Apart from that, we have also provided better hosting alternatives for Magento 2 installation with managed cloud hosting.
Now, it is your call. Make a wise decision about installing Magento ecommerce platform because your business depends on it.
See: How to Install Magento 2 on Localhost Using XAMPP
Frequently Asked Questions for Installing Magento 2 on Debian 9
Q1. Which is better for Magento? A managed or an unmanaged hosting solution?
Obviously, a managed hosting solution for your ecommerce store is a perfect choice. However, if you are launching a server for the first time – practicing about how to launch your server, then you can choose an unmanaged Debian server to host LAMP and then Magento.
Beware: It will take half of your day if you are not too slow. If you are, it will take even more time.
Q2. Do I need to install LAMP? Why can’t I directly install Magento 2 on Debian?
A good question. Well, LAMP is an abbreviation of Linux, Apache, MySQL, and PHP. And, since Magento is based on the Zend framework of PHP you need to install that all before you can install Magento 2 on a Debian cloud server. But if that looks too overwhelming, then go for a managed Magento cloud hosting solution.
Q3. How much does it cost to host Magento on DigitalOcean?
You can easily launch the DigitalOcean for Magento using managed cloud hosting with the lowest cost of $10/mo.


