Magento 2 Tutorials 
Add Quantity Increment and Decrement Button in Magento 2 with KnockoutJS
- Syed Muneeb Ul Hasan
- July 10, 2017
Knockout is a javascript library which follows MVVM (Model-View-View-Model) Pattern and used for creating front end. You can easily handle complex data-driven interfaces using Knockout JS, and since it is open source, it is free to use.
Knockout JS is lightweight and mostly used in checkout pages in Magento 2. However Knockout JS is slightly complex to implement in Magento 2, hence, this tutorial will teach you how to implement Knockout JS in Magento 2.
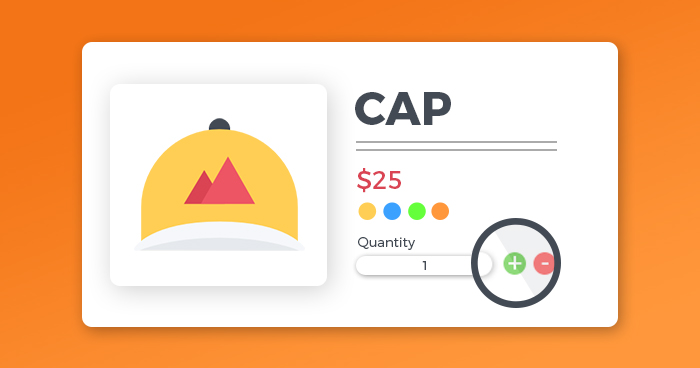
On the product page, Magento 2 has a simple input text filed on product page for quantity and to make it easier for customers, you can add increment and decrement button in Magento 2. I will implement it using custom module and if you are not familiar with its implementation and usage, you can check out this guide: Custom Module in Magento 2.
Let’s Start!
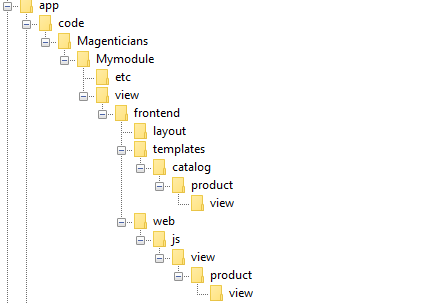
Create Directories
First, go to the root directory of your Magento 2 store and create directories as shown below:
Configure Module
Configure your module by creating a module.xml file in app/code/Magenticians/Mymodule/etc.Add the following code in it:
<?xml version="1.0"?>
<config xmlns:xsi="http://www.w3.org/2001/XMLSchema-instance" xsi:noNamespaceSchemaLocation="urn:magento:framework:Module/etc/module.xsd">
<module name="Magenticians_Mymodule" setup_version="1.0.0"></module>
</config>
Registration of Module
Now register the module by creating registration.php in app/code/Magenticians/Mymodule, and add the following code in it:
<?php
\Magento\Framework\Component\ComponentRegistrar::register(
   \Magento\Framework\Component\ComponentRegistrar::MODULE,
   'Magenticians_Mymodule',
   __DIR__
);
Copy addtocart.phtml
Go to vendor/magento/module-catalog/view/frontend/templates/product/view from the root directory of your store and copy addtocart.phtml to your own module app/code /Magenticians/Mymodule/view/frontend/templates/catalog/product/view. The addtocart.phtml file will looks like this:
<?php
/**
* Copyright © 2013-2017 Magento, Inc. All rights reserved.
* See COPYING.txt for license details.
*/
// @codingStandardsIgnoreFile
/** @var $block \Magento\Catalog\Block\Product\View */
?>

<?php $_product = $block->getProduct(); ?>
<?php $buttonTitle = __('Add to Cart'); ?>
<?php if ($_product->isSaleable()): ?>
<div class="box-tocart">
   <div class="fieldset">
       <?php if ($block->shouldRenderQuantity()): ?>
       <div class="field qty">
           <label class="label" for="qty"><span><?php /* @escapeNotVerified */ echo __('Qty') ?></span></label>
           <div class="control">
               <input type="number"
                      name="qty"
                      id="qty"
                      maxlength="12"
                      value="<?php /* @escapeNotVerified */ echo $block->getProductDefaultQty() * 1 ?>"
                      title="<?php /* @escapeNotVerified */ echo __('Qty') ?>" class="input-text qty"
                      data-validate="<?php echo $block->escapeHtml(json_encode($block->getQuantityValidators())) ?>"
                      />
           </div>
       </div>
       <?php endif; ?>
       <div class="actions">
           <button type="submit"
                   title="<?php /* @escapeNotVerified */ echo $buttonTitle ?>"
                   class="action primary tocart"
                   id="product-addtocart-button">
               <span><?php /* @escapeNotVerified */ echo $buttonTitle ?></span>
           </button>
           <?php echo $block->getChildHtml('', true) ?>
       </div>
   </div>
</div>
<?php endif; ?>
<script type="text/x-magento-init">
   {
       "#product_addtocart_form": {
           "Magento_Catalog/product/view/validation": {
               "radioCheckboxClosest": ".nested"
           }
       }
   }
</script>
<?php if (!$block->isRedirectToCartEnabled()) : ?>
<script type="text/x-magento-init">
   {
       "#product_addtocart_form": {
           "catalogAddToCart": {
               "bindSubmit": false
           }
       }
   }
</script>
<?php endif; ?>
Edit addtocart.phtml
In addtocart.phtml, create a UI component and initialize it. To do that, first add the script below above the input field of quantity:
<script type="text/x-magento-init">
{
   "*": {
           "Magento_Ui/js/core/app": {
               "components": {
                   "qty_change": {
                       "component": "Magenticians_Mymodule/js/view/product/view/qty_change",
                       "defaultQty": <?php echo $block->getProductDefaultQty() * 1 ?>
                   }
               }
           }
   }
}
</script>
Now connect the component qty_change with the following frontend HTML:
<div class="control" data-bind="scope: 'qty_change'">
   <button data-bind="click: decreaseQty">-</button>
   <input  data-bind="value: qty()"
   type="number"
   name="qty"
   id="qty"
   maxlength="12"
   title="<?php echo __('Qty') ?>"
   class="input-text qty"
   data-validate="<?php echo $block->escapeHtml(json_encode($block->getQuantityValidators())) ?>"
   />
   <button data-bind="click: increaseQty">+</button>
</div>
Data-bind attribute: Connect HTML with a Javascript function of our component qty_change.
In the code above, there are two buttons which I have connected to the component by using Javascript click event which will be used to decrease/increase the quantity value. The final addtocart.phtml file will looks like this:
<?php
/**
* Copyright © 2013-2017 Magento, Inc. All rights reserved.
* See COPYING.txt for license details.
*/
// @codingStandardsIgnoreFile
/** @var $block \Magento\Catalog\Block\Product\View */
?>

<?php $_product = $block->getProduct(); ?>
<?php $buttonTitle = __('Add to Cart'); ?>
<?php if ($_product->isSaleable()): ?>
<div class="box-tocart">
   <div class="fieldset">
       <?php if ($block->shouldRenderQuantity()): ?>
       <div class="field qty">
           <label class="label" for="qty"><span><?php /* @escapeNotVerified */ echo __('Qty') ?></span></label>

<script type="text/x-magento-init">
{
   "*": {
           "Magento_Ui/js/core/app": {
               "components": {
                   "qty_change": {
                       "component": "Magenticians_Mymodule/js/view/product/view/qty_change",
                       "defaultQty": <?php echo $block->getProductDefaultQty() * 1 ?>
                   }
               }
           }
   }
}
</script>

<div class="control" data-bind="scope: 'qty_change'">
   <button data-bind="click: decreaseQty">-</button>
   <input  data-bind="value: qty()"
   type="number"
   name="qty"
   id="qty"
   maxlength="12"
   title="<?php echo __('Qty') ?>"
   class="input-text qty"
   data-validate="<?php echo $block->escapeHtml(json_encode($block->getQuantityValidators())) ?>"
   />

   <button data-bind="click: increaseQty">+</button>
</div>
       </div>
       <?php endif; ?>
       <div class="actions">
           <button type="submit"
                   title="<?php /* @escapeNotVerified */ echo $buttonTitle ?>"
                   class="action primary tocart"
                   id="product-addtocart-button">
               <span><?php /* @escapeNotVerified */ echo $buttonTitle ?></span>
           </button>
           <?php echo $block->getChildHtml('', true) ?>
       </div>
   </div>
</div>
<?php endif; ?>
<script type="text/x-magento-init">
   {
       "#product_addtocart_form": {
           "Magento_Catalog/product/view/validation": {
               "radioCheckboxClosest": ".nested"
           }
       }
   }
</script>
<?php if (!$block->isRedirectToCartEnabled()) : ?>
<script type="text/x-magento-init">
   {
       "#product_addtocart_form": {
           "catalogAddToCart": {
               "bindSubmit": false
           }
       }
   }
</script>
<?php endif; ?>
Create qty_change.js
Now create qty_change.js in app/code/Magenticians/Mymodule/view/frontend/web/js/view/product/view. Add the following code in it:
define([
   'ko',
   'uiComponent'
], function (ko, Component) {
   'use strict';
   return Component.extend({
       initialize: function () {
           //initialize parent Component
           this._super();
           this.qty = ko.observable(this.defaultQty);
       },
       decreaseQty: function() {
           var newQty = this.qty() - 1;
           if (newQty < 1)
           {
               newQty = 1;
           }
           this.qty(newQty);
       },
       increaseQty: function() {
           var newQty = this.qty() + 1;
           this.qty(newQty);
       }
   });
});
Create catalog_product_view.xml
Lastly, just create catalog_product_view.xml in app/code/Magenticians/Mymodule/view/frontend/layout. Add the following code in it:
<?xml version="1.0"?>
<page layout="1column" xmlns:xsi="http://www.w3.org/2001/XMLSchema-instance" xsi:noNamespaceSchemaLocation="urn:magento:framework:View/Layout/etc/page_configuration.xsd">
   <body>
       <referenceBlock name="product.info.addtocart">
           <action method="setTemplate">
               <argument name="template" xsi:type="string">Magenticians_Mymodule::catalog/product/view/addtocart.phtml</argument>
           </action>
       </referenceBlock>
       <referenceBlock name="product.info.addtocart.additional">
           <action method="setTemplate">
               <argument name="template" xsi:type="string">Magenticians_Mymodule::catalog/product/view/addtocart.phtml</argument>
           </action>
       </referenceBlock>
   </body>
</page>
The purpose of the code above is to change the default addtocart.phtml template.
Run the Commands
Go to the root directory of your store by using SSH terminal and run the following commands:
rm -rf var/di var/generation var/cache/* var/log/* var/page_cache/*

php bin/magento module:enable Magenticians_Mymodule

php bin/magento setup:upgrade

php bin/magento setup:di:compile

php bin/magento indexer:reindex

php bin/magento cache:clean

php bin/magento cache:flush
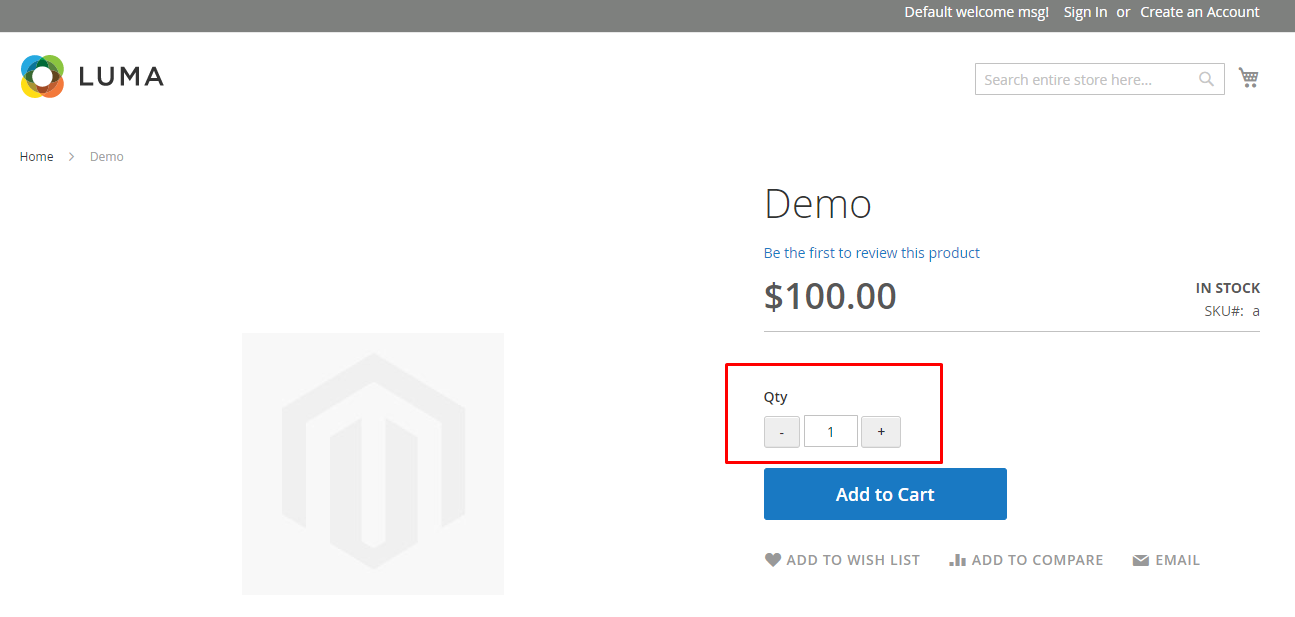
Now go to the product page and you will see the result:
Final Words
Always try to make it easier for customers to buy products on your store as it can result in boosted sales. After following this tutorial, you should be able to add quantity increment decrement button in Magento 2 with Knockout JS, and you also learned the implementation of Knockout JS in Magento 2.


