In the world of ecommerce, there are many ecommerce platforms, with Magento 2 being on top of the list. It is a great option for users who are looking for a secure and customizable ecommerce platform with loads of awesome features.
There are different ways of extending the core functionality of a Magento 2 powered ecommerce store, and working with Magento 2 events and observers is one of the main ways among them. With the help of them, you can run your custom codes in response to a specific Magento event or even with a custom event.
So, today in this guide I am going to teach you, how to use events and observers in Magento 2. But before going towards the implementation, let’s first understand about Magento 2 events and observers:
Magento 2 Events
Events are dispatched by Magento modules on the trigger of a specific action. Not only that, Magento also allows you to also create your own custom event that can be dispatched in your code. When the action is triggered, it will pass data to the relevant observer configured for the dispatched event.
Magento 2 events can be dispatched using Magento\Framework\Event\Manager class and it can be obtained through the dependency injection by defining the dependency in your constructor.
Magento 2 Observers
Observers are used to catch the action which was triggered from events. In observers, you can set the required functionality or logic that is to be executed in response.
Magento 2 observers can be created by lacing your class file under the Module-Root/Observer directory. Your observer class should implement the following;
Magento\Framework\Event\ObserverInterface and define its execution function.
Now let’s start with the execution!
Let’s assume that you want to change the background color of your store if the customer is not logged in.
Use Magento 2 Event and Observer
I will start by creating a custom Magento 2 module:
Configuration of Module
For configuration of a custom module, create a module.xml file in app/code/Magenticians/Mymodule/etc and add this code in it:
<?xml version="1.0"?>
            <config xmlns:xsi="http://www.w3.org/2001/XMLSchema-instance" xsi:noNamespaceSchemaLocation="urn:magento:framework:Module/etc/module.xsd">
                        <module name="Magenticians_Mymodule" setup_version="2.1.1"></module>
            </config>
Registration of Module
For registration of module, create a registration.php file in app/code/Magenticians/Mymodule and add this code in it:
<?php
\Magento\Framework\Component\ComponentRegistrar::register(
\Magento\Framework\Component\ComponentRegistrar::MODULE,
'Magenticians_Mymodule',
__DIR__
);
Create a Magento 2 Event
To create a Magento 2 event, add a new file events.xml in app/code/Magenticians/Mymodule/etc/frontend and add this code to it:
<?xml version="1.0" encoding="UTF-8"?>
    <config xmlns:xsi="http://www.w3.org/2001/XMLSchemainstance" xsi:noNamespaceSchemaLocation="../../../../../../lib/internal/Magento/Framework/Event/etc/events.xsd">
        <event name="layout_load_before">
            <observer name="add_layout_handles" instance="Magenticians\Mymodule\Observer\AddHandles" />
        </event>
    </config>
In the above code, I have used layout_load_before in the name attribute of the event element. Then in the observer elements, add_layout_handles in the name attribute and Magenticians\Mymodule\Observer\AddHandles in the instance attribute. The observer name must be unique for each event.
Create a Magento 2 Observer
Now to create Magento 2 observer, add a new file AddHandles.php in app/code/Magenticians/Mymodule/Observer and add this code to it:
<?php

namespace Magenticians\Mymodule\Observer;

use Magento\Framework\Event\Observer;
use Magento\Framework\Event\ObserverInterface;
use Magento\Customer\Model\Session as CustomerSession;

class AddHandles implements ObserverInterface
{
    /**
    * @var CustomerSession
    */
    protected $customerSession;
    /**
    * Add constructor.
    * @param CustomerSession $customerSession

    */

    public function __construct(CustomerSession $customerSession)
    {
        $this->customerSession = $customerSession;
    }

    public function execute(\Magento\Framework\Event\Observer $observer)
    {
        $layout = $observer->getEvent()->getLayout();

        if (!$this->customerSession->isLoggedIn())
        {
            $layout->getUpdate()->addHandle('customer_logged_out');
        }
    }
}
In the above code, you can see the constructor for customer session. And you can also see the execute function that I added the handle customer_logged_out to the layout.
Create a Layout File
As I mentioned in the previous step about the handle customer_logged_out. For that, create a file customer_logged_out.xml in app/code/Magenticians/Mymodule/view/frontend/layout and add this code to it:
<?xml version="1.0"?>
<page xmlns:xsi="http://www.w3.org/2001/XMLSchema-instance" xsi:noNamespaceSchemaLocation="urn:magento:framework:View/Layout/etc/page_configuration.xsd">
<head>
        <css src="Magenticians_Mymodule::css/customcolor.css"/>
   </head>
</page>
In the above code, I set the path of CSS file under <head> which will execute for guest users.
Create a CSS File
Now create the CSS file which is mentioned in customer_logged_out.xml file. To do that, add customcolor.css file in app/code/Magenticians/Mymodule/view/frontend/web/css and add this code to it:
body
{
background-color: #a58f8f;
}
In the above code, I have set backgorud color which will apply only on guest users.
Run CLI Commands
Launch SSH terminal and connect your Magento 2 store. Then go to its root directory to run the following commands:
First, run this command:
rm -rf var/di/* var/generation/* var/cache/* var/log/* var/page_cache/* var/session/* var/view_preprocessed/* pub/static/*
To upgrade the setup:
php bin/magento setup:upgrade
To compile the setup:
php bin/magento setup:di:compile
To deploy static content:
php bin/magento setup:static-content:deploy -f
To re-index:
php bin/magento indexer:reindex
To clean and flush the cache:
php bin/magento cache:clean
php bin/magento cache:flush
All done, it’s time to check the output. Go to your store’s front page as a guest user and you will see the background color of your store is changed:
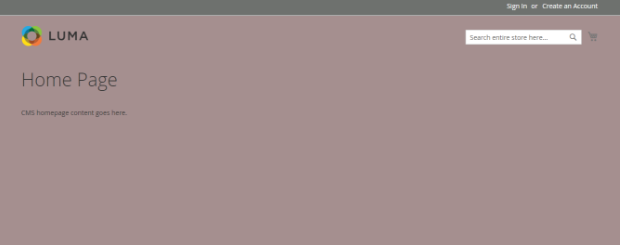
This means you have successfully implemented events and observer in Magento 2.
Wrapping Up
Events and observers should help you in adding more functionality to your Magento 2 powered store. I have just shown you an example of using Magento 2 events and observers, you can extend it according to your needs and requirements. After following this guide, I hope you’ve learned how to use Magento 2 events and observers. If you still have any confusions or want to discuss anything related to this tutorial, drop your comment below and I will get back to you!


