
Sometimes, it is helpful to set up Multi stores Magento 2 since it offers a few advantages over having multiple ecommerce websites on different platforms. For example:
- Retaining a single customer database instead of splitting data across multiple websites.
- Since there is only one payment gateway, you save costs of setting multiple gateways.
- Standardization and templating – for example, boilerplate text for terms and conditions, etc.
- Responsive frameworks.
- Third party extensions and integrations-unified support across the whole store for other data points which can be difficult to achieve with other solutions. Our Magento Developers at Purenet are in the process of setting this up for many of our Magento-specific clients and thought we’d pass on what we’ve found to be really great information.
Things to bear in mind
There are some potential drawbacks which are worth considering before you invest resources in a multi-site solution:
- The resources pulled from the servers can be extremely high when the XML tree has to be built for all sites; it is wise to use dedicated servers with adequate specifications to handle the requests.
- From an SEO standpoint, duplicate content can potentially become a massive problem.
Let’s start how to setup multi store in Magento 2!
Setup Magento 2 Multi Store
How to Set Up Multi store in Magento 2
Configuration
- Head into the admin panel and go to Stores > Settings > All Stores.
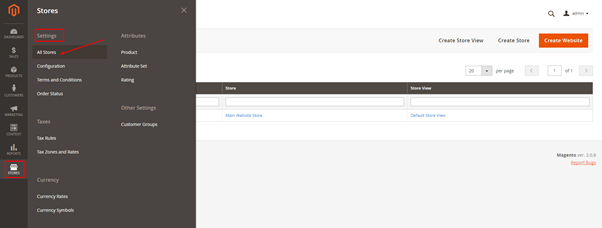
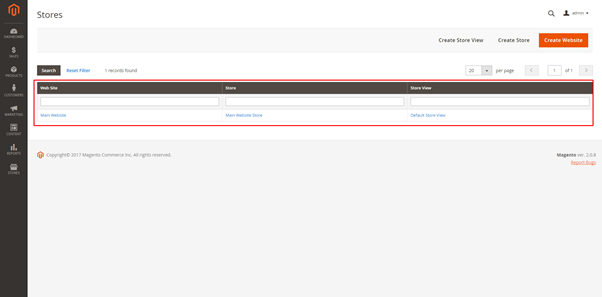
- Once you are in this section, you can view a list of all the stores that have already been set up. If no additional stores have been added, the one you added will be the default store view.
- To add a new store, click the button in the top right labeled “Create Website”.
Creating a New Website
Step 1:
Fill the form for the new website after clicking “Create Website.” Here’s the info you’ll have to fill:
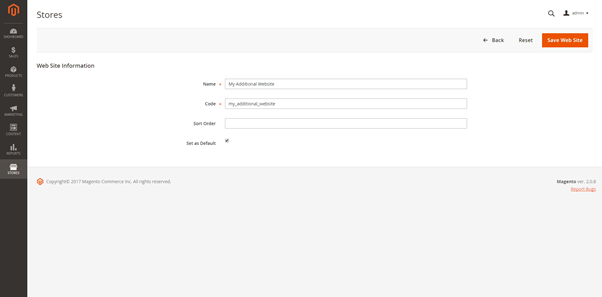
- Name – This will be the name of the website and how you will identify it in the future.
- Code – This will be the store code. This needs to be unique so you can easily reference it without any conflicts.
- Sort order – The order of your store’s priority. This isn’t a required field.
- Set as Default – This option, if ticked, will make this new website the default store for your Magento 2.
Step 2:
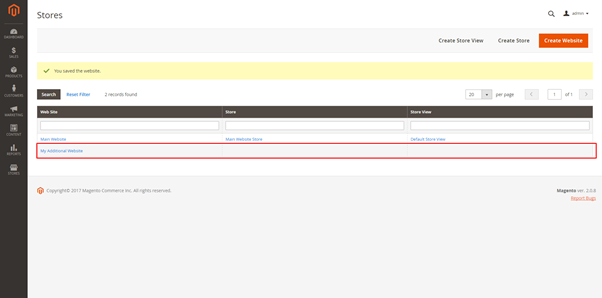
After you have filled the required details, save the added website by clicking “Save Website.”
Step 3:
We will now return to the list of stores we have set up and our new website should now be added to the list.
Creating a Store
Step 1:
As we have created a website, now we are going to create a new store. Click the “Create Store” button on the Stores > Settings > All Stores page. We will be presented with another form for us to fill in to configure out the new store.
Step 2:
In this form, we will be presented with 3 options:
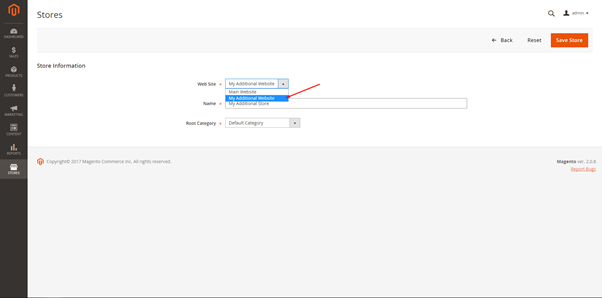
- Web Site – Here we will choose which website we will use for our new store. In this example, we will be using the website we have just setup, “My Additional Website”.
- Name – This will be the name of our new store which in the example I’ve chosen to be “My Additional Store”.
- Root Category – If we want our new store to list different products and categories we can setup a new “Root Category” (See section later in the document about how to create one of these) for our store to look at rather than the default category list. In this example, we will just be using the default root category.
Step 3:
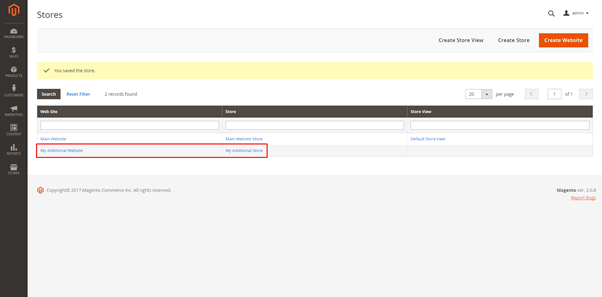
Upon saving, we will return to the store’s list, where our store has now been assigned to the new website we setup in the previous section.
Creating a store view
Step 1:
To create a new store view we will be presented with another form.
Step 2:
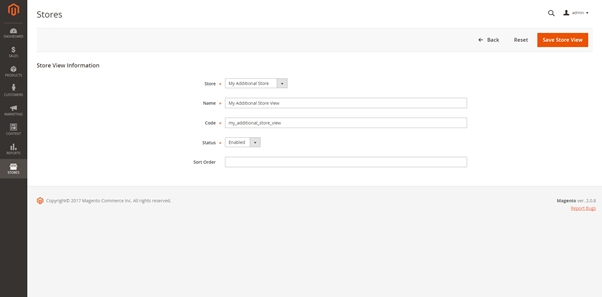
- Store – Which store our new store view will look at. We will choose the one we setup in the previous step.
- Name – The store views name, best keeping this unique.
- Code – This will be our store view code, keep this unique as this is how we will reference to it.
- Status – Whether our store view will be enabled/disabled.
- Sort order – The only not mandatory field in this form.
Step 3:
After we have clicked save, we will be returned to the list of stores. And we have now successfully created our new store. We will now just need to configure our new store.
Once we have finished all three sections listed above we are now ready to configure our store. We now want to head to Stores > Settings > Configuration. Once we are here we want to choose our new store from the dropdown located in the top right.

Once we have done this we want to click on the General > Web tab and add our Base URL for our new store front.
Conclusion
Now that you know the importance and advantages of having Magento 2 multi stores and also know how to configure them through your admin panel, you can get started immediately.
Author Bio
Ben Henderson works for Purenet, Specialist Magento developers based in Yorkshire in the UK who also provide bespoke ecommerce solutions. He enjoys writing about the technical SEO side of ecommerce, and on using tools and software to optimize ecommerce stores.


