Disclaimer: Magenticians does not necessarily agree with the views expressed in this guest post. They are presented to bring to light all diverse views in the Magento and general ecommerce community.
You are attempting to install and run Magento 2 with little success. After jumping through the various hoops to get the site to load, you are now stuck facing 404 responses, no styles or javascript loading, broken admin URL, frontend design is all messy, or CSS is not linked to it.
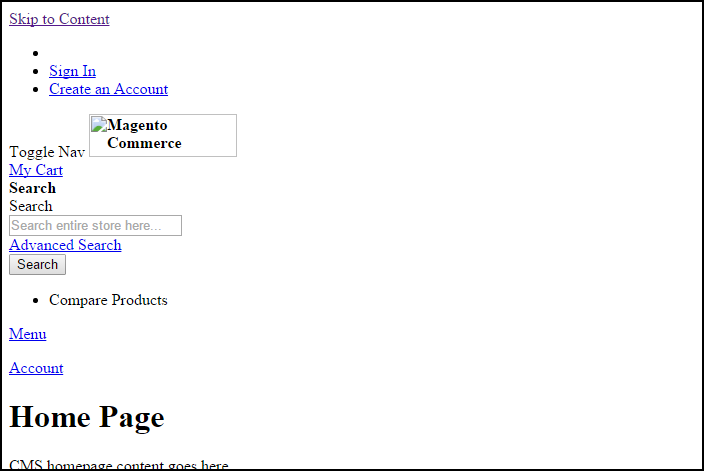
When you look at the browser’s console, you will find the errors referencing the attempts to access files that are missing in the pub/static folder of Magento 2. The “frontend” folder does get loaded; however, some files are not present.
Today, we would like to focus on this serious matter occurring after Magento 2 installation. This issue is very critical as it breaks down the newly installed Magento 2, so we will be discussing all possible issues. Let’s dive in and check how to fix broken Magento 2 installation.
1. Enable Apache Rewrite
First of all, check whether you have enabled the Apache server rewrite or not. If not, you need to enable it. If you are a Linux user, just follow these steps:
Go to terminal, and type: sudo a2enmod rewrite
Once it’s done, you will need to restart the Apache service to apply changes. To do so, type: sudo service apache2 restart
You can also ask your hosting provider to help you in this case.
2. Fix Files & Folders Permissions
Ownership and permissions can also cause a problem. It is necessary to apply proper permissions to all files and folders of Magento 2. Please read this official DevDoc >File System Ownership and Permissions to know more clearly about Magento 2 files & folders permissions.
3. Delete Generated Files, Sessions & Caches
In this step, we are going to delete caches, sessions & old files that are generated before. To delete caches and sessions, navigate to the following paths and delete everything:
MAGENTO2_ROOT > var > cache > *DELETE ALL*
MAGENTO2_ROOT > var > page_cache > *DELETE ALL*
MAGENTO2_ROOT > var > session > *DELETE ALL*
MAGENTO2_ROOT > var > view_preprocessed > *DELETE ALL*
Also, remove everything including old generated static files from below path except .htaccess:
MAGENTO2_ROOT > pub > static > DELETE ALL EXCEPT .HTACCESS
4. Deploy Static View Files
The static view files refer to the files which are not generated dynamically. That includes images or CSS files. These files are located in the pub/static directory of your Magento 2, and some are cached to the var/view_preprocessed directory as well.
The static view files must be written to the Magento 2 file system using the Command-Line Interface (CLI). To deploy static view files, run the following command in Magento 2 root directory:
php bin/magento setup:static-content:deploy
5. Reindex the Indexer
Magento indexer transforms data available in Magento, to improve the performance of storefront. As the data changes, the transformed data must be updated or reindexed. To reindex the indexer in Magento 2, run the below command:
php bin/magento indexer:reindex
Conclusion
Nothing is 100% perfect. Magento 2 is shaping up as yet, so when you plan to install and run Magento 2, remember! Work is still going on, and Magento is working hard to make this platform a perfect ecommerce solution for everyone. The above guide will completely fix broken Magento 2 installation and other critical issues. If you have any question related to it, you are most welcome to ask in the comments section below.


