Articles 
How Cloudways Simplifies Magento Google Cloud Installation
- Syed Muneeb Ul Hasan
- March 17, 2020
The success of any ecommerce business is more or less dependent upon the performance of the underlying hosting solution. So the question is which hosting to choose when you have shared hosting solution, dedicated server and cloud hosting solution?
Undoubtedly, shared hosting for ecommerce is not a good solution until & unless someone is looking for a cheap solution. Dedicated servers are also a good option in terms of performance but if any uncertainty happens with the server then the ecommerce store has to suffer.
So cloud hosting is the only choice that is a reliable option. The great thing about cloud hosting is that, if anything happens on cloud server then it would be transferred to another cloud server within no time and without breaking your store.
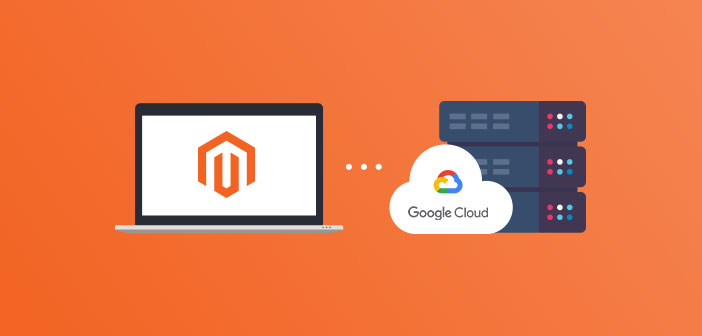
When it comes to cloud hosting options for ecommerce stores (particularly Magento, since it needs a lot of resources to function properly), Magento Google cloud hosting is a great option because it checks all the boxes. Here’s why!
Why Choose Magento Google Cloud?
The first reason to choose Google Cloud is simple – it powers most of Google’s infrastructure including the search engine. Magento on Google cloud benefits from a host of benefits and features that make sure that the google powered platform is a reliable foundation for online businesses.
However, to really benefit from the power of Google hosting server, Magento store owners should opt for a managed GCE hosting solution mainly because of the fact that very few Magento store owners are tech-savvy enough to manage the initial migration and the subsequent application setup and server management tasks.
Thus, they need a dependable managed Google cloud hosting platform that removes all server management hassles so that they can focus on growing their business. Exploring hosting reviews for managed Google cloud hosting services can help businesses make an informed choice and ensure they have a reliable and hassle-free hosting environment.
For all Magento store users, I have two simple solutions for addressing their hosting woes:
- The first option is to launch a Magento store on Google Cloud. Cloudways has an easy-to-follow GUI based process of launching a Magento store on a managed GCE server.
- If you are familiar with CLI commands and want to install a Magento store on a managed Google cloud server, Cloudways supports CLI based installation process for Magento stores.
Launch Magento Google Cloud Hosting Through GUI
For the purpose of demonstrating the ease of installing Magento Google cloud hosting through a GUI, I will use Cloudways. The platform offers 1-Click managed Magento hosting that comes with industry-leading features such as two-factor authentication, IP whitelisting, and others.
If you are interested in exploring the Cloudways’ features in detail, visit the Cloudways features page.
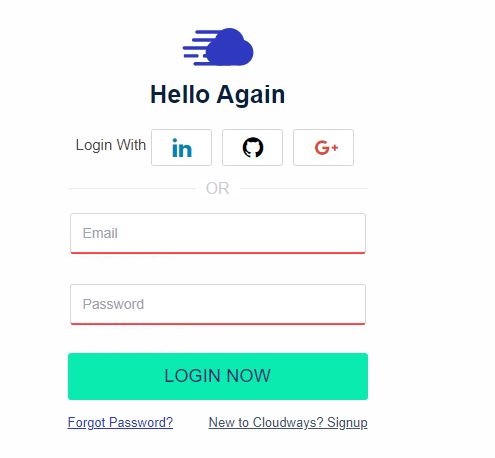
The first step is to signup for cloud hosting that will just take a few minutes.
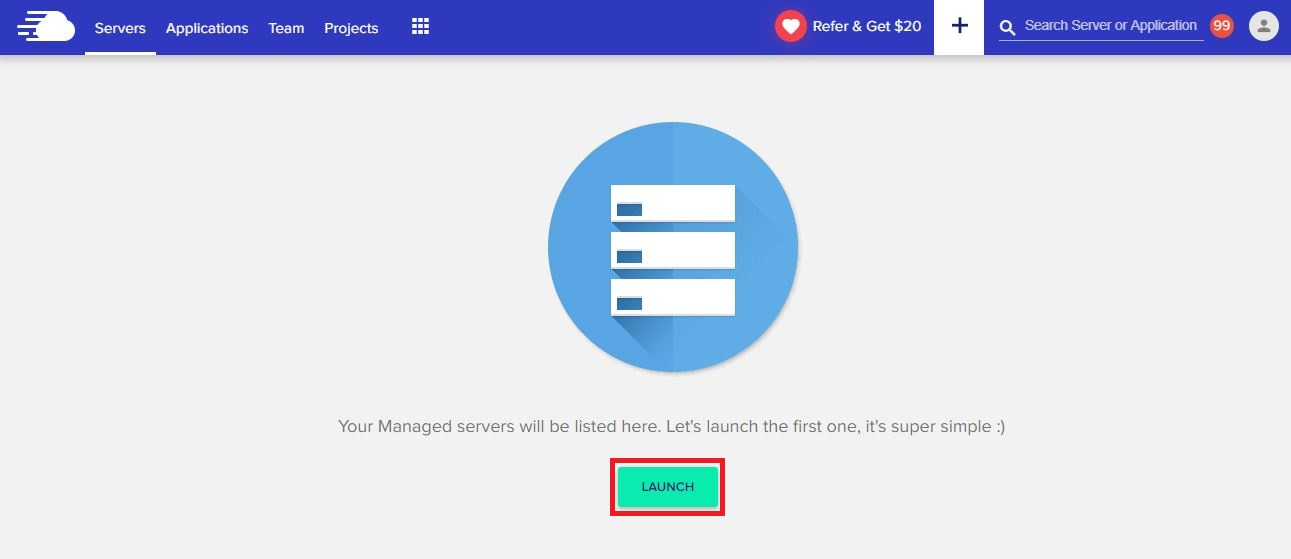
Next, it is time to launch your first server on the platform. Remember that you have the choice of five different cloud infrastructure providers including AWS, Google Cloud, DigitalOcean, Linode, and Vultr.
In my case, I will choose the Google hosting server as mentioned earlier that Cloudways offers dozens of rich-features. And more importantly, it doesn’t require all those relevant experience to manage the Google servers.
Launch a GCE Server and Magento Application on the Cloudways Platform
Click the “Launch” button
Next, select the Magento version you want to launch. Name your application, server, project and select Google cloud as the cloud provider.
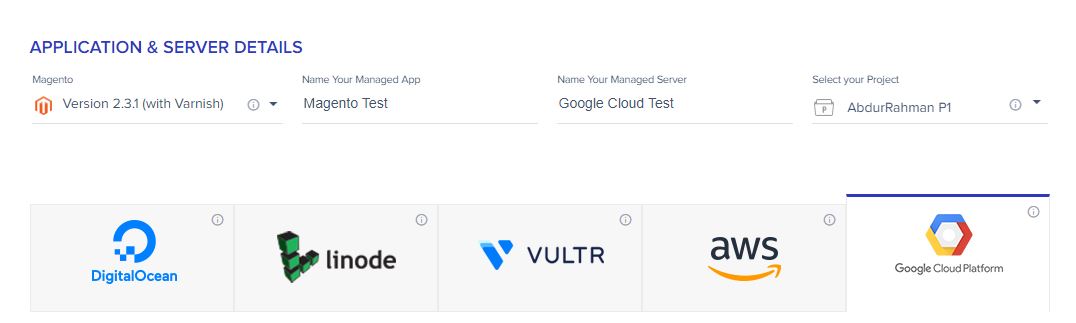
Select the server size, bandwidth, and storage.
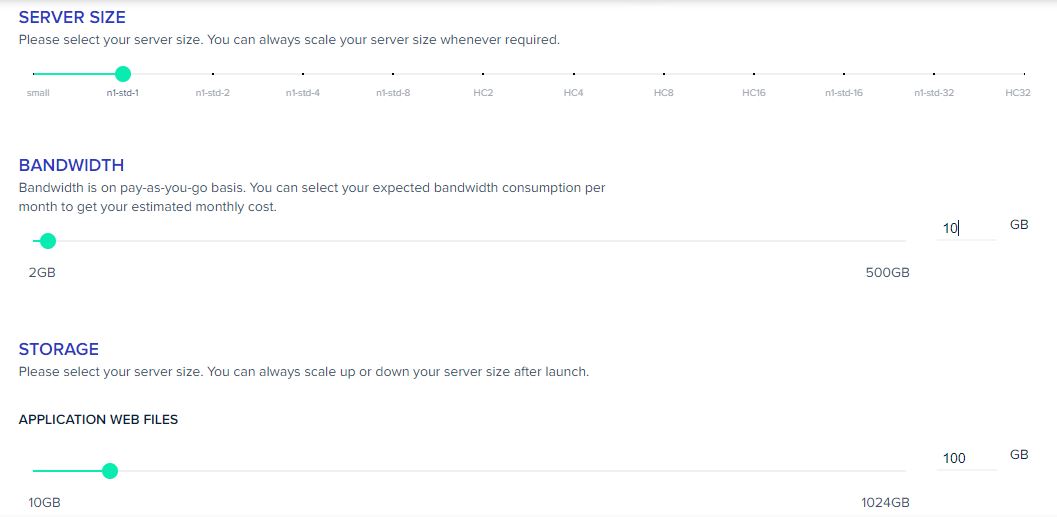
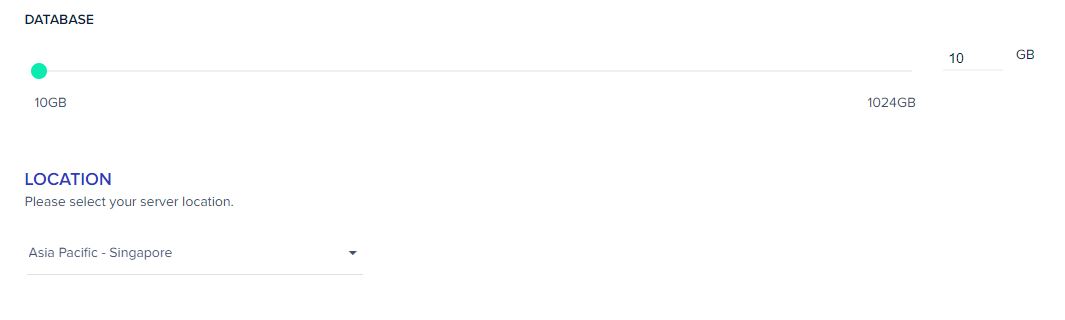
Next, define the size of your database and data center location where you wish to host your server. Note that the location should be closest to the target audience to reduce the latency and improve user experience.
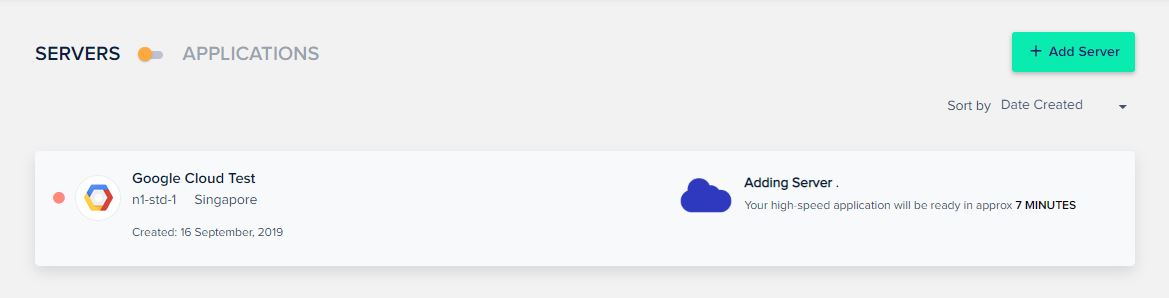
Finally, click the “Launch Now” button at the bottom right corner.
The platform would take a few minutes to set up the server and the Magento application. The entire process is automated and you do not have to do anything during the process. The best part – once the process finishes, your Magento application would be ready for your online business.
Once the server is up and running, navigate to your managed Google cloud hosting server. On the server management screen, you could see all the options you can use to manage various server settings.
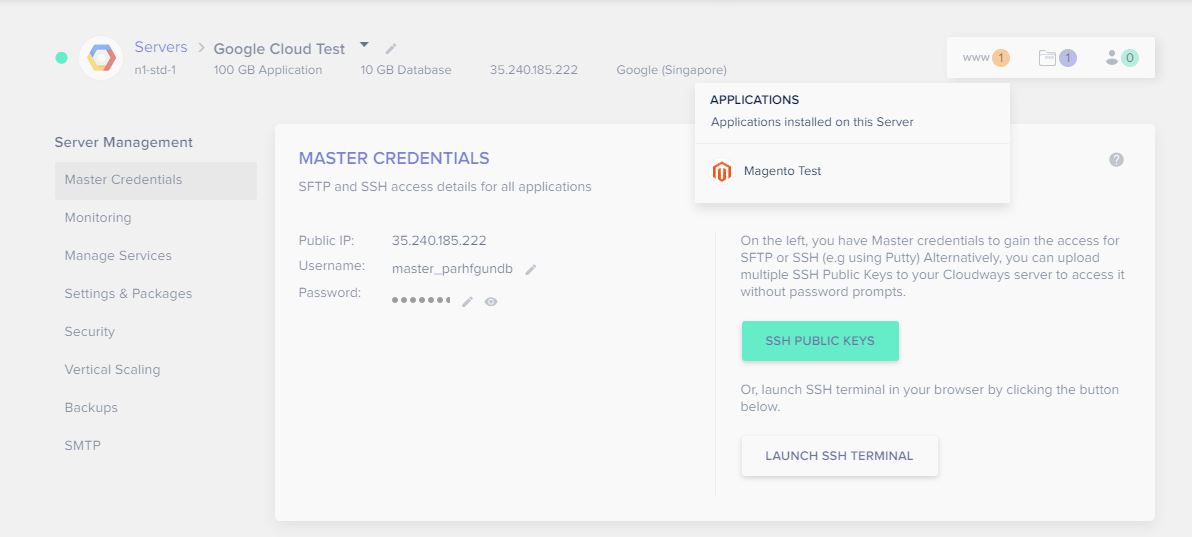
To access the details of the Magento application, go to the application management screen where you can see application-level credentials and access links. As you can see, on your managed Google cloud hosting server, you have a lot of freedom to manage the installed Magento application.
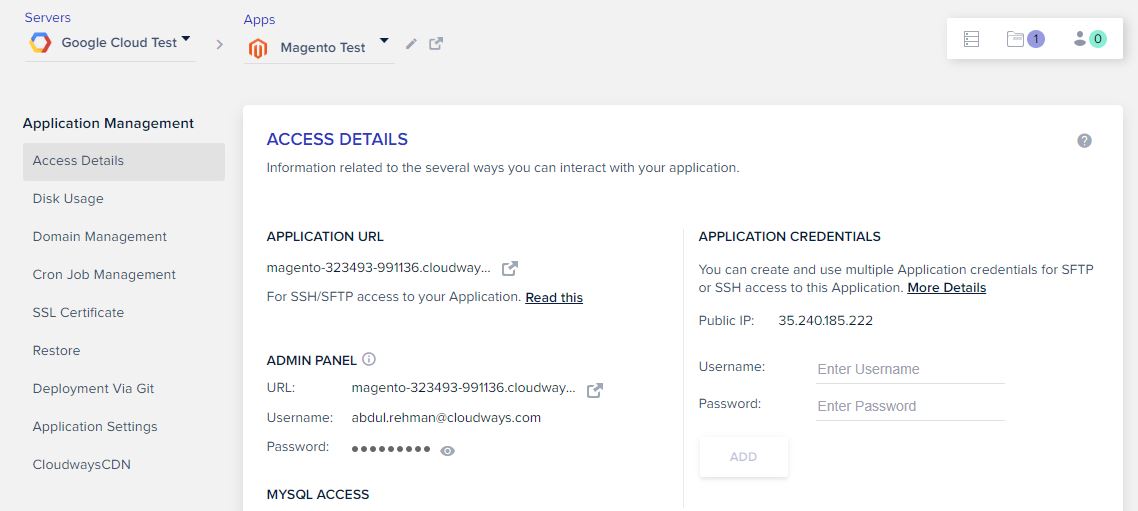
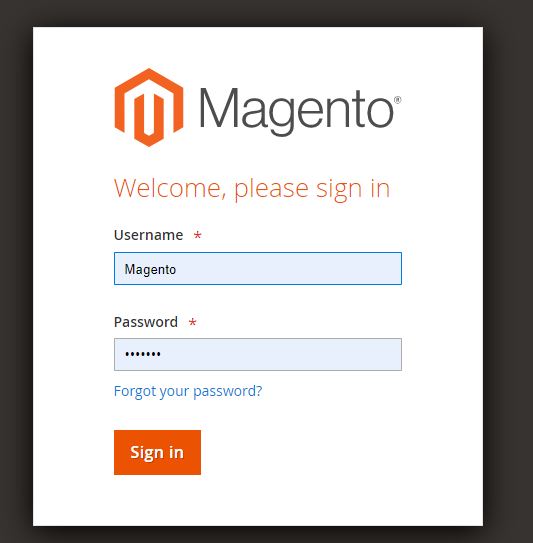
To view your Magento store, simply click the Application URL on the Access Details screen. To access the admin panel, click the link under the Admin Panel area and use the given credentials to log into the admin panel.
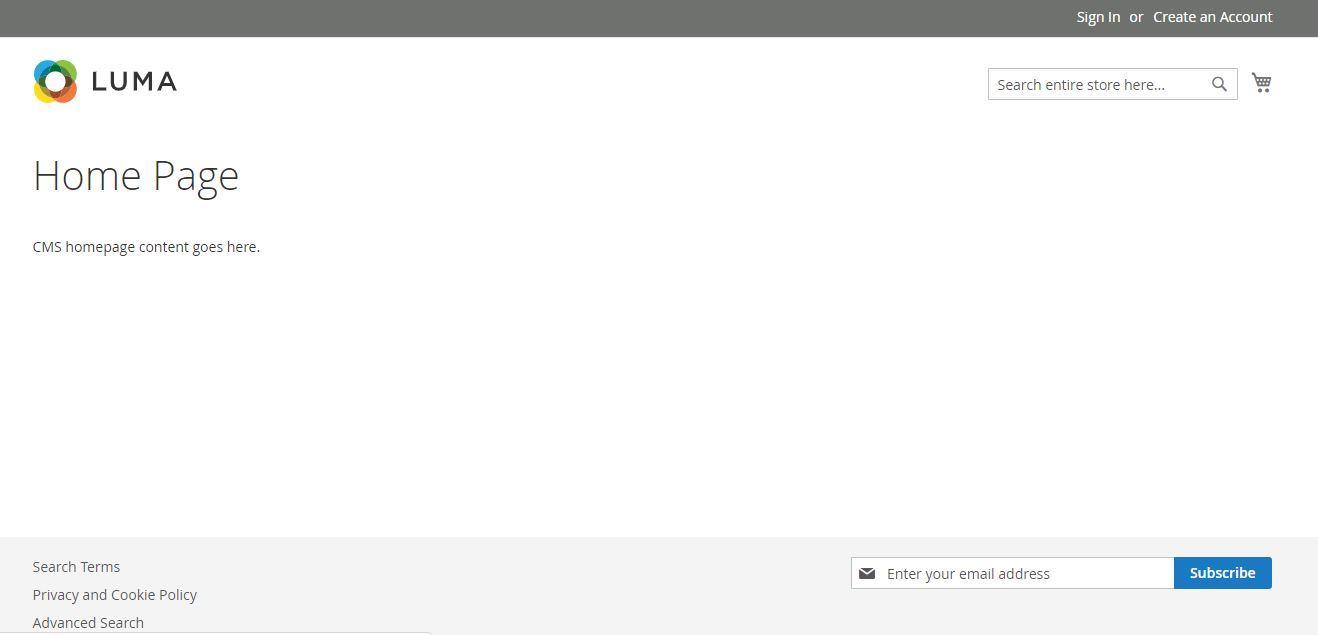
Magento Front-End View
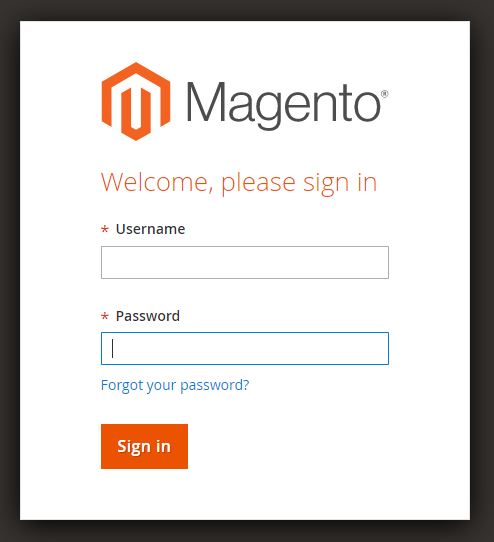
Here is the screengrab of Magento Admin Panel.
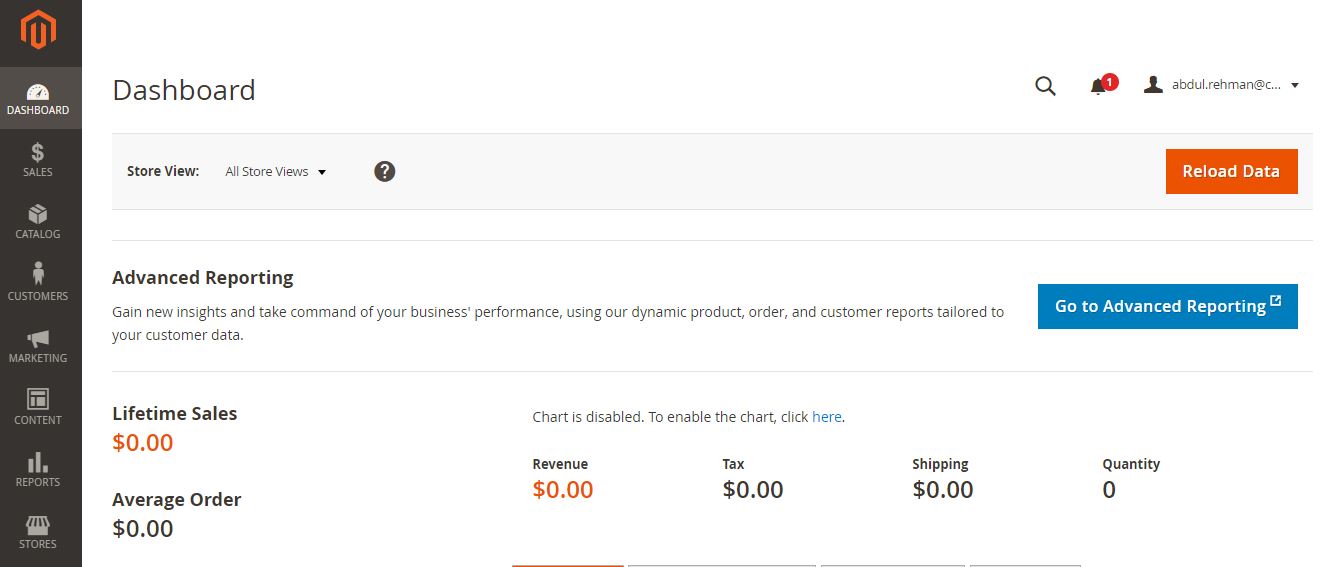
After logging in, you can access the Magento Dashboard.
That’s it. You can now upload a decent theme and officially launch it for the public.
Why Cloudways for Google Cloud?
If you are looking to host your Magento store on a managed Google cloud server, Cloudways offers the perfect platform with numerous features such as server and application management, consistent support, store and server security, and a fast stack for flawless performance. If you are looking to host your Magento store on a Cloudways managed GCE server, here are several features that simply and optimize the user experience:
Advance Cache for Better Performance: Cloudways offers a powerful combination of Apache and NGINX web servers, supported by Memcached, Varnish, and Redis and FPC caches that optimize Magento performance.
Ironclad Security: With features like dedicated firewalls, IP whitelisting, Two-Factor Authentication, free SSL certificates, and other security features, Cloudways ensures security for your Magento store.
Collaboration: Magento stores are usually developed and managed by several people. Cloudways simplifies collaboration among the team members through a dedicated Team feature. Using this feature, server owners (usually the agency or the store owners) can add (or remove) team members and give out server and application access rights t each individual.
Server Access and Control: Cloudways offers SSH and SFTP access to simplify server maintenance and control. Note that this requires familiarity with CLI commands. Magento store owners are often not tech-savvy enough to use CLI commands, and thus, the Cloudways platform offers almost all server management functionalities in the dashboard.
Now, to give you the other side of the picture, let’s discuss how to set up Magento on an unmanaged Google Cloud hosting server. The store would be directly hosted on Google Cloud and would be completely unmanaged. You will not get a GUI interface or 1-Click installation features.
Why Cloudways for Google Cloud?
Experience the simplest and seamless installation of Google Cloud Server for your Magento applications with Cloudways.
Set up Magento Google Cloud Hosting Server
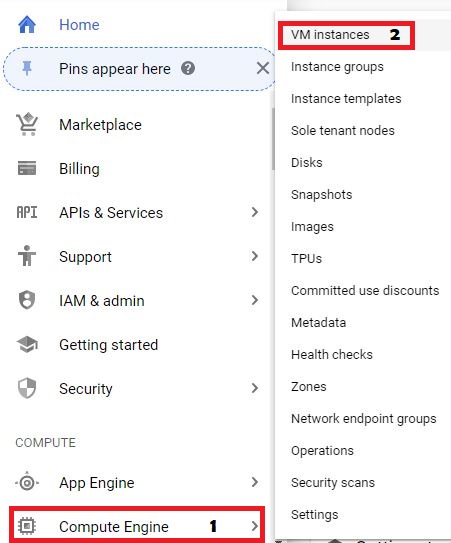
Go to Google Cloud Platform and set up an account.
Now, navigate to Google Compute Engine and select VM instances. Your Google cloud hosting will be available under the Virtual Machine (VM) instances.
To launch the Magento store from scratch, simply click on the “Create” button. If you already have a store, you can “import” it through the migration service. If you are still confused, use Google Cloud’s help by clicking the “Take the quickstart” button.
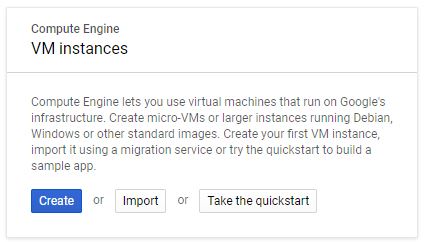
For the purpose of this article, I will start from scratch.
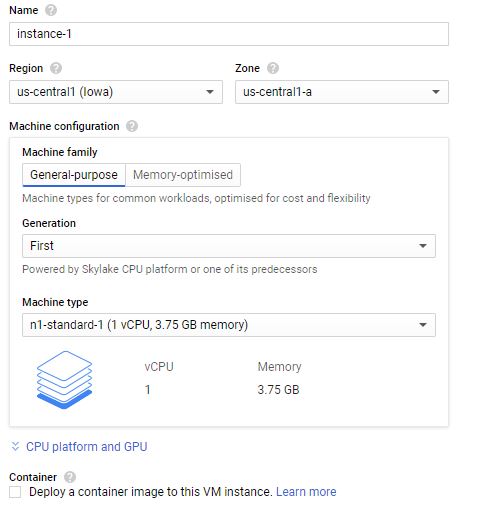
Create New Google Cloud Instance
For creating a new instance, define the following details
- Name of the instance
- Region & Zone where you want to host your Magento store. Remember that it should be close to your targeted audience to reduce latency rate and improve server response time.
- Machine Configuration/Resources that you believe will be needed to host your Magento store and successfully run it. Here, you must define the number.of CPUs, RAM, Storage, OS and other technical details. I have opted for a Linux environment and thus chose Ubuntu OS for this installation. You can use any other distro of your choice.
- Next, you have to define API access and Firewall for your application.
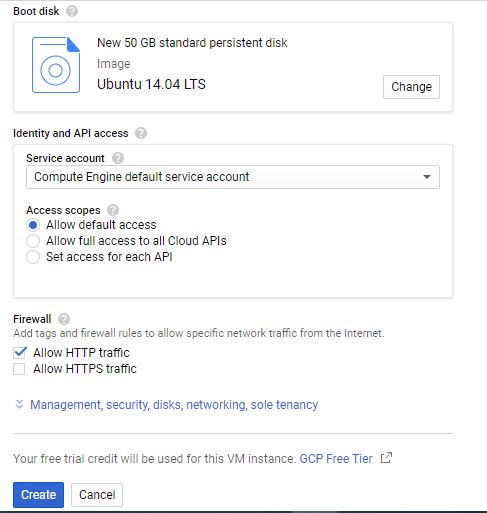
Once you have defined everything for creating the instance, click the “Create” button.
Install Magento Pre-Requisite Tools on Google Cloud Server
You will have to execute the following code on the SSH terminal to install the required Magento setup tools on Google cloud hosting.
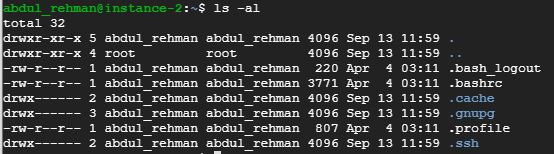
Command: ls -al
This will show all the directories on the server.
Command: sudo su
This will direct you to the home/ubuntu directory. You can see that you are logged in as the root user.
![]()
Command: apt-get update
Now, update your server with the latest tools.

Command: sudo apt-get install apache2 php libapache2-mod-php mysql-server php-mysql php-dom php-simplexml php-curl php-intl php-xsl php-mbstring php-zip php-xml composer
This code will install Apache, PHP, and other necessary tools for Magento and MySQL server that would serve as the database.
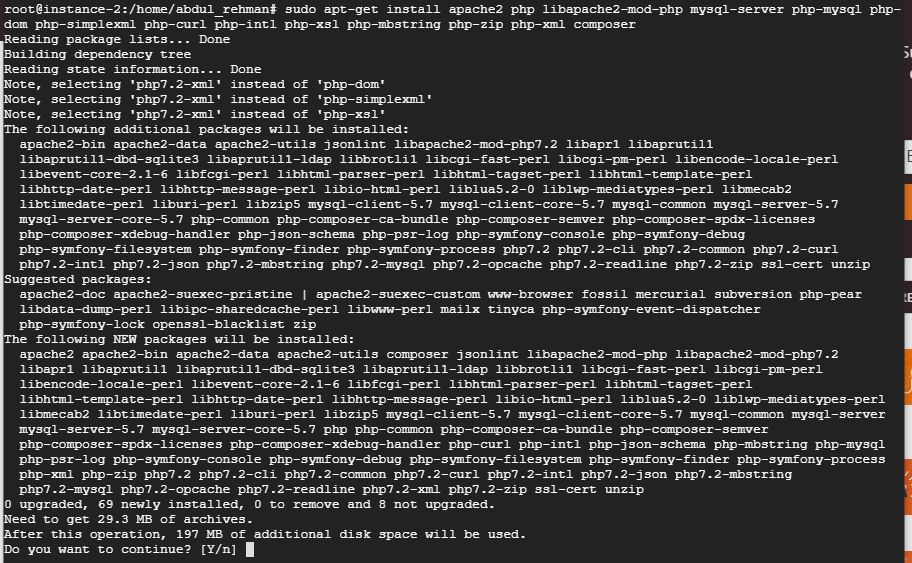
Press Y when asked ‘do you want to continue? Once the installation is complete, you must create a database.
Now, install PHP gd extension
Command: apt-get install php7.2-gd (can vary with PHP version)

Command: apt-get install php7.2-mcrypt (can vary with PHP version)

Command: sudo a2enmod rewrite
Restart the Apache application on Google cloud server:
Command: systemctl restart apache2

Navigate to Apache and run the following command to set up your Google cloud hosting.
Command: cd /etc/apache2/
Now, run the following command
Command: sudo nano apache2.conf
Press ctrl+w and search for “Indexes”
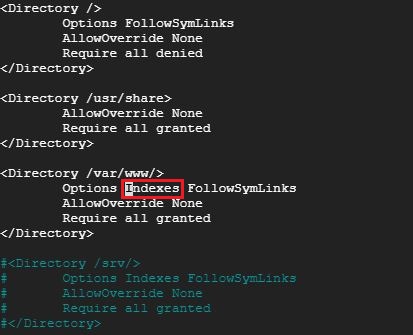
Replace ‘None’ with ‘all’ (like this):
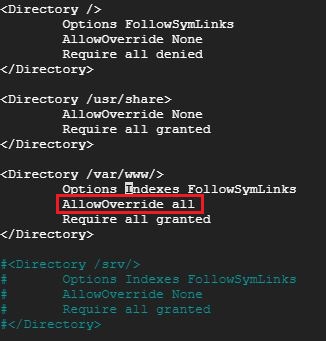
Press Ctrl+x, press Y and hit Enter.
Restart the Apache services:
Command: systemctl restart apache2.service
Now go to the public root directory and clone Magento 2 from Github:
Command: cd /var/www/html
![]()
Command: git clone https://github.com/Magento/Magento2.git
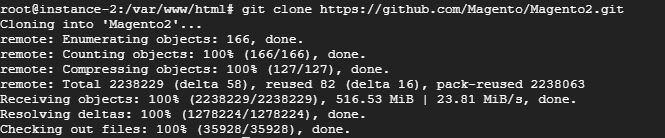
Command: cd Magento2
![]()
Now, install the composer:
Command: composer install
If you come across the following error:
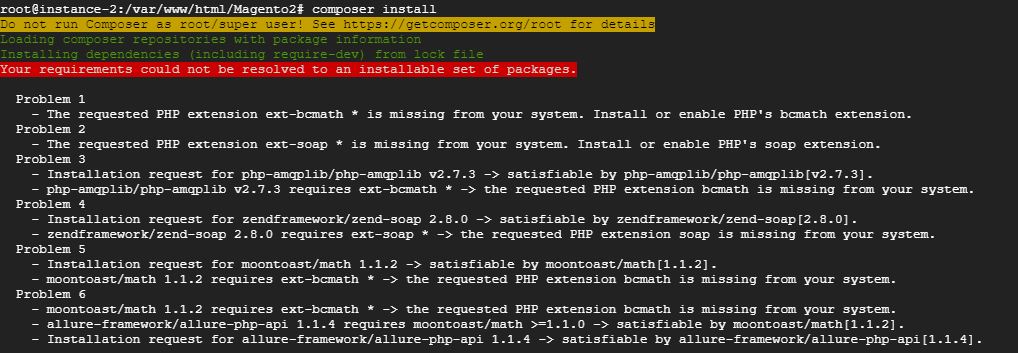
Resolve it by running the following command:
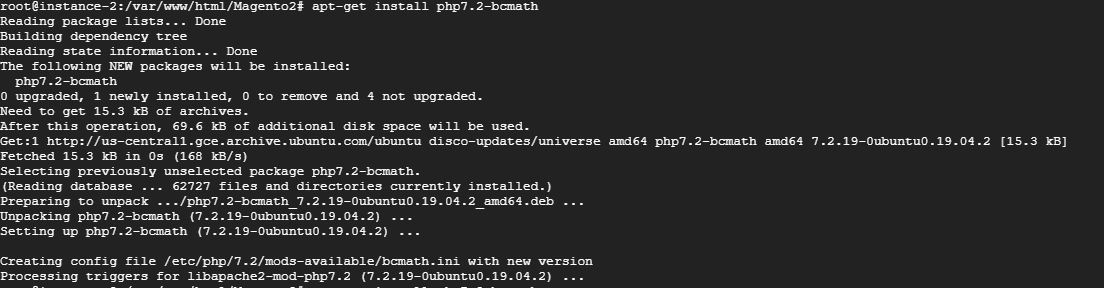
Command: apt-get install php7.2-bcmath
Command: composer install

If you are still unable to iinstall the composer (see the following screengrab), run:
Command: sudo apt-get install php-soap
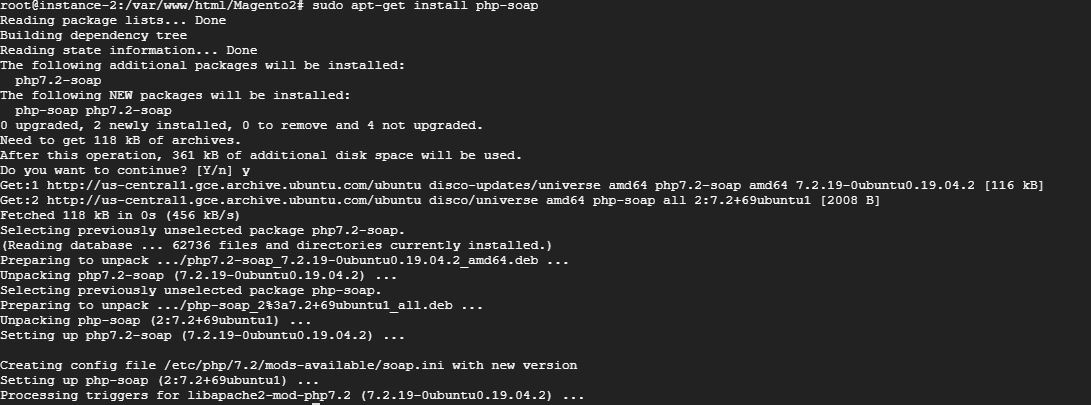
Command: composer install

Now you have to change the permissions of the folder so that you can complete Magento setup and install the required files:
Command
chmod -R 755 /var/www/html/Magento2/
chmod -R 777 /var/www/html/Magento2/var/
chmod -R 777 /var/www/html/Magento2/pub/
chmod -R 777 /var/www/html/Magento2/app/etc
chmod -R 777 /var/www/html/Magento2/generated
Command: sudo service apache2 restart
![]()
This restart is an important step because otherwise, php extension will be missing and the Magento installation process cannot proceed.
Setup the Database
Log into the MySQL by using the command:
Command: mysql -u root -p
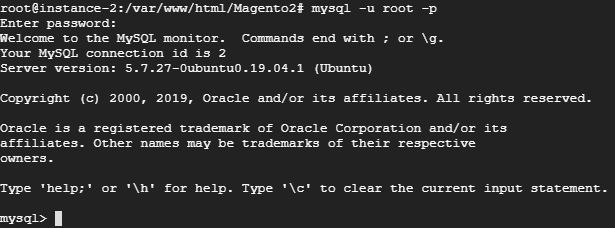
It will ask you for a password. By default it’s none, so just press Enter. Now you are in MySQL terminal.
show databases: shows the current table
create database Magento: creates a database for the Magento store
Command:
create database magento;
create user magento IDENTIFIED BY ‘magento’;
GRANT ALL ON magento.* TO magento@localhost IDENTIFIED BY ‘magento’;
flush privileges;
Exit
(Once you type Exit, you will exit from MySQL terminal)
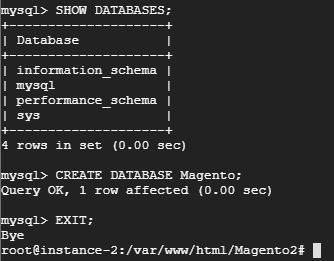
Creating Database Screenshot

Install and Configure Magento on GCE
Navigate to your public IP address:
Copy and paste it in your browser address bar (something like: xx.xxx.xxx.xx/Magento2/setup)
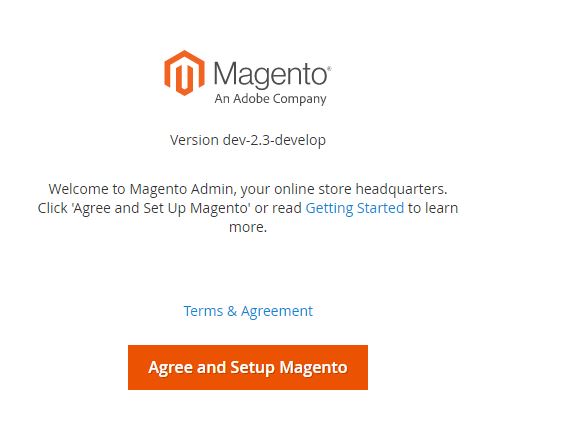
You will see the following screen. It means you are all set to install Magento on Google Cloud.
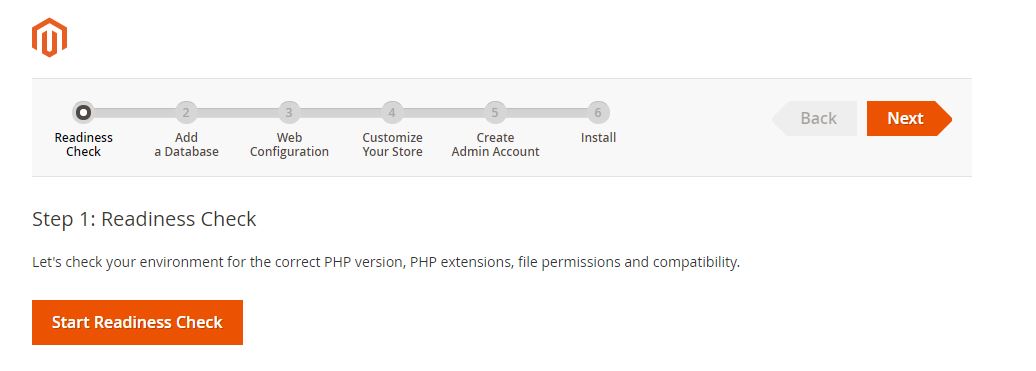
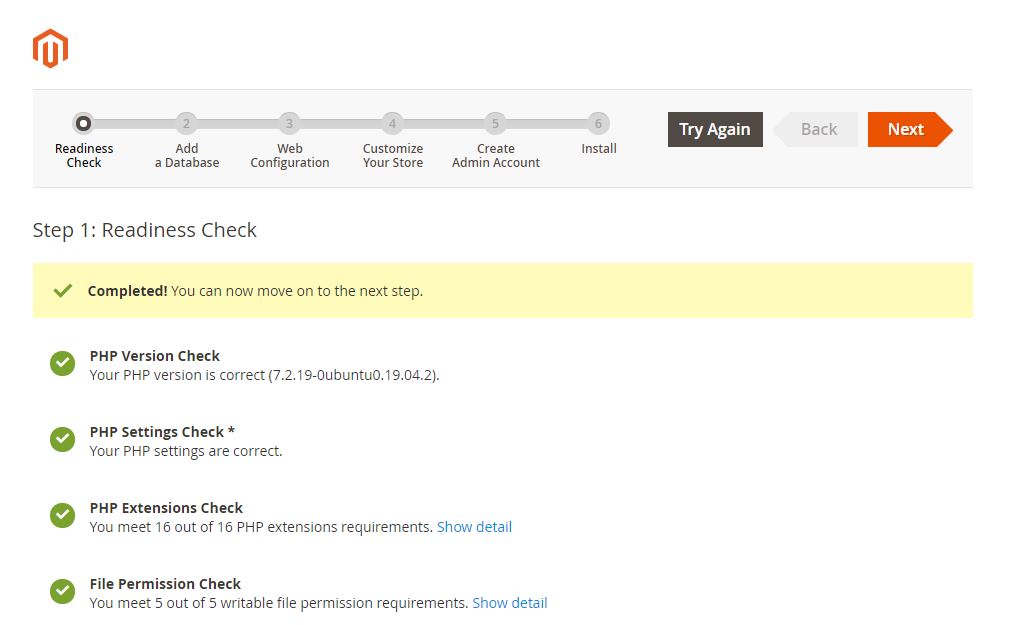
Now start installing Magento on the domain
The first step in the Magento installation process is the Readiness Check, in which PHP details and file permission requirements are validated.
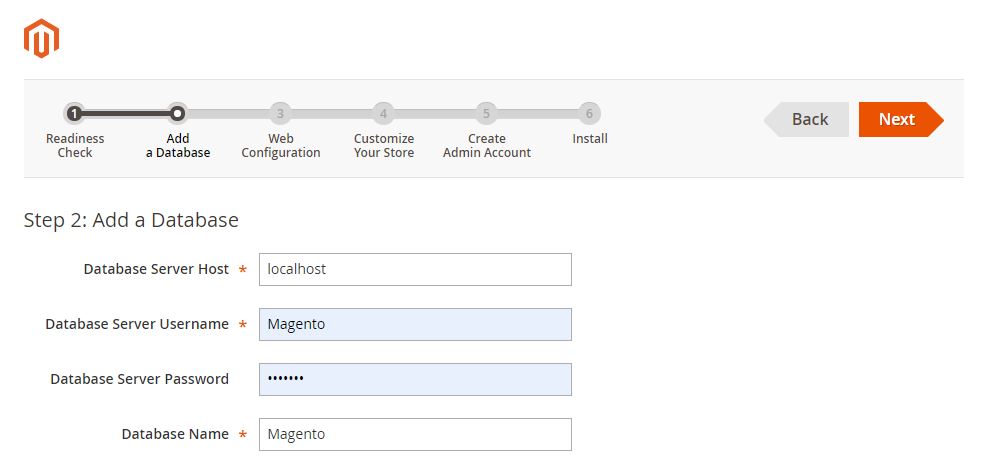
The details of the database created in the previous steps for the Magento Google cloud will be visible here.
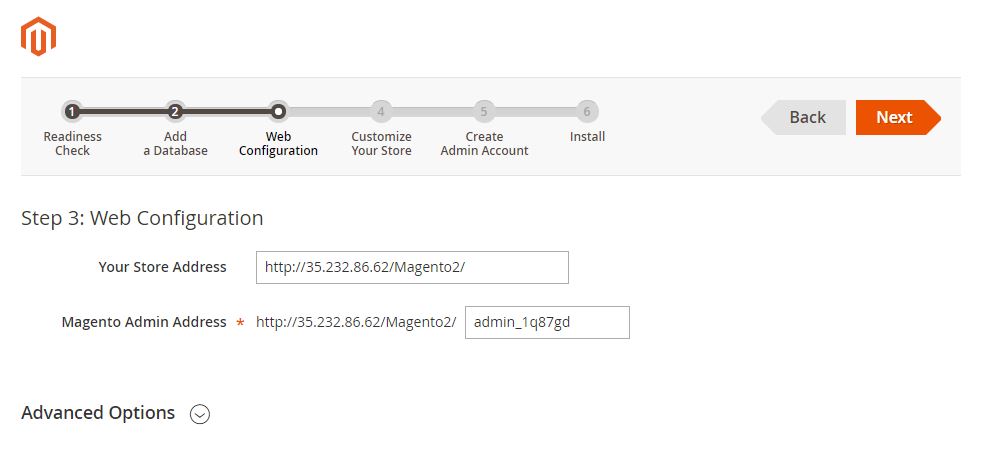
Now configure the store domain and admin domain for the Magento store
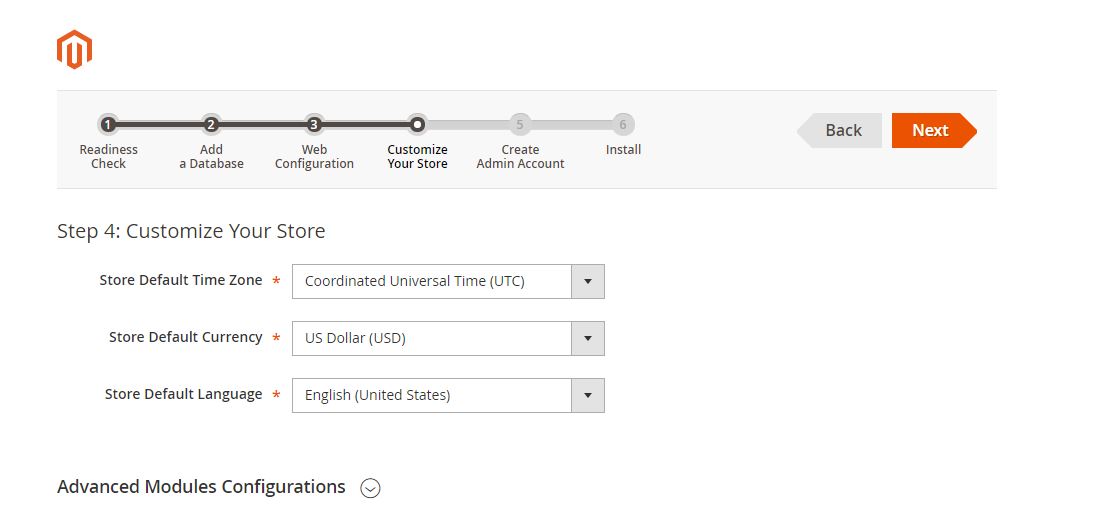
Customize the basic details of your store according to your preferred region.
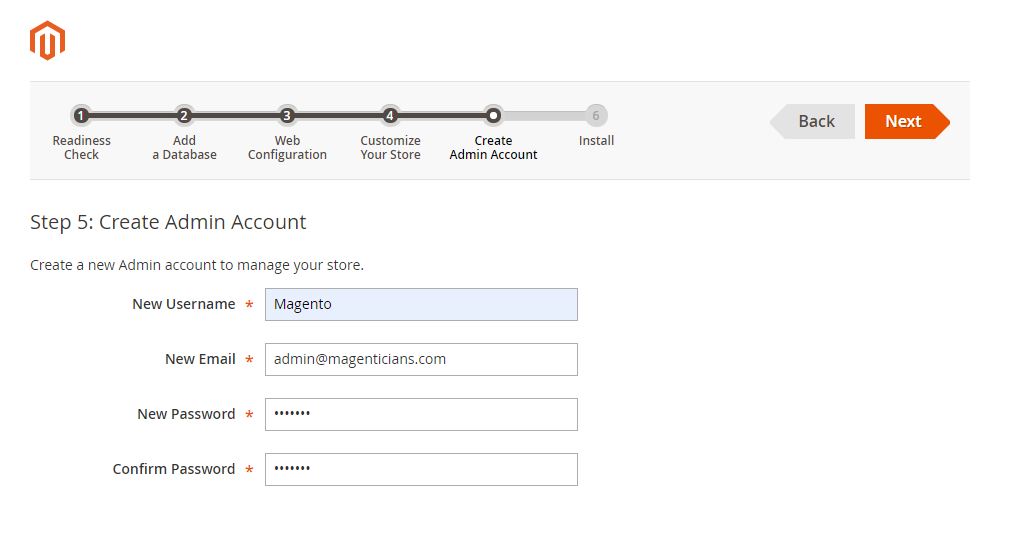
Enter your desired admin credentials for the Magento store. Note that these credentials will be used to log in to the Magento admin panel.
Finally, check all the details highlighted below.
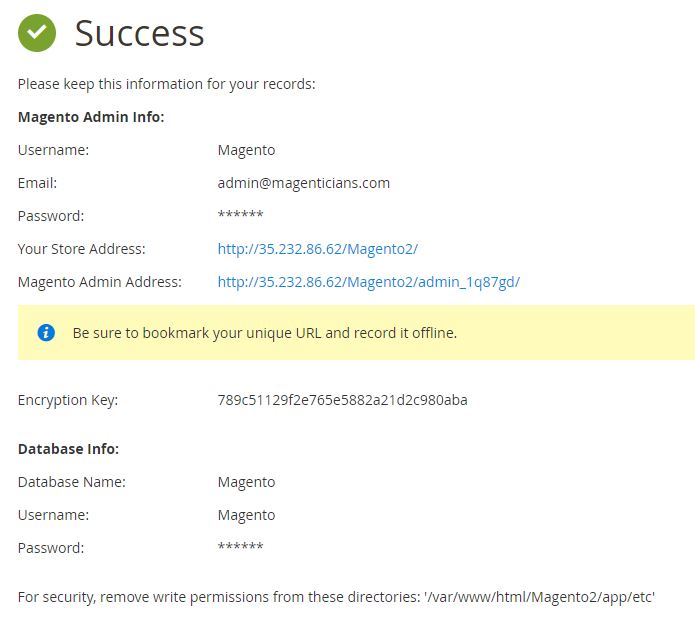
After the successful installation of the Magento store, here are the screenshots of Magento Frontend and Backend.
P.S: I hope that you got a clear picture of why I opt Cloudways for Hosting the Magento on Google cloud server.
Frontend Store View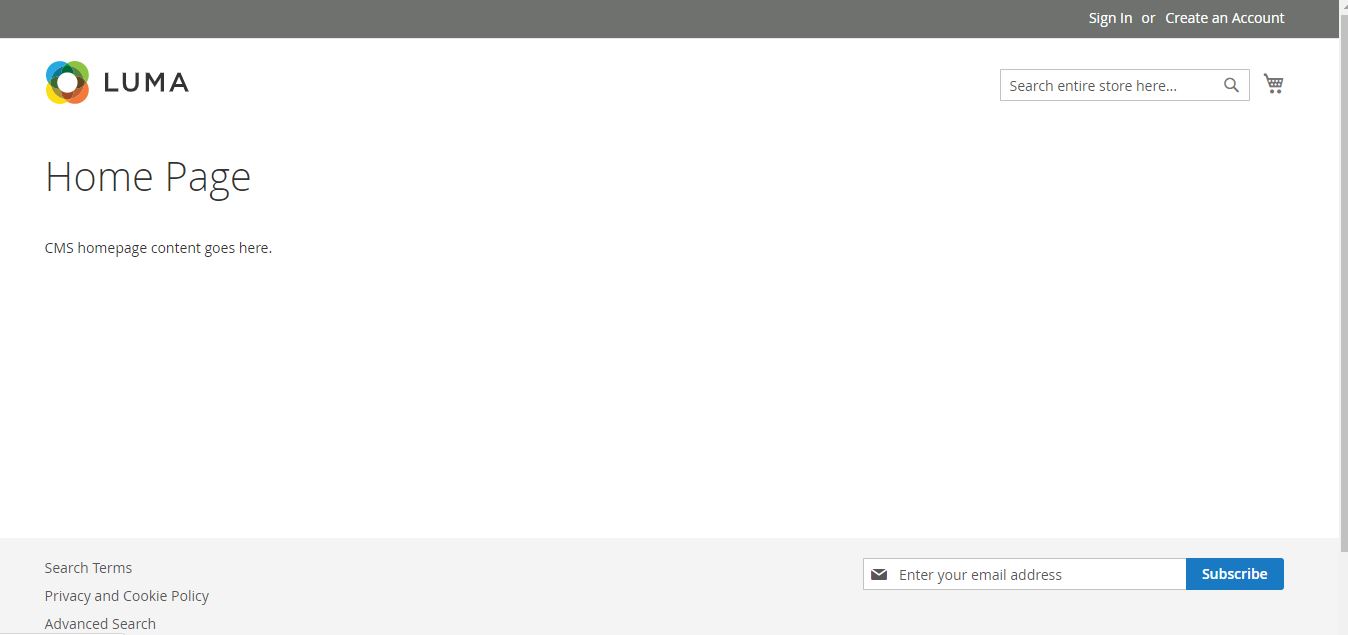
Backend Admin Panel View
Summing Up
Google Cloud hosting solution is a trusted and reliable solution to launch a Magento store due to its credibility and infrastructure. Setting up Magento on Google cloud hosting is not for the faint of heart. Cloudways offers a simple and hassle-free way of setting your Magento store on a managed GCE server so that all your efforts go toward managing and growing your business rather than server management. I have covered both the solutions of installing the Magento platform. Now it is up to you to decide which one works better for you.


