Magento Tutorials 
How to Install Magento Theme Manually – A Step by Step Guide
- Syed Muneeb Ul Hasan
- April 17, 2017

A Theme or Template is the face of your Magento ecommerce store. And just like a beautiful face with a great personality in real life can have a positive impact on people, a powerful and feature-rich theme that also looks good to the eye helps in enhancing the experience of your site visitors.
Magento Theme Installation Guide
Steps to Install Magento Theme
While the default Magento 1 theme is a good start, to begin with, but as your store becomes more popular, you might need a better-looking theme with enhanced navigation and advanced options on its frontend. There are a number of great free Magento themes to choose from on the Magento Commerce Marketplace, and while we’ve made the choosing a theme part easy for you, it’s probably the ‘installing a Magento 1 theme’ part that you are more worried about. However, this tutorial will have you installing a theme on your Magento in no time!
There are two methods of installing a theme on Magento 1:
- Installing a theme using Magento Connect,
- Uploading Magento theme files via FTP.
In this tutorial we are going to learn how to install Magento themes via Magento Connect, and we strongly recommend that you primarily use this method.
How to Install Magento Connect Themes
Let’s start the process.
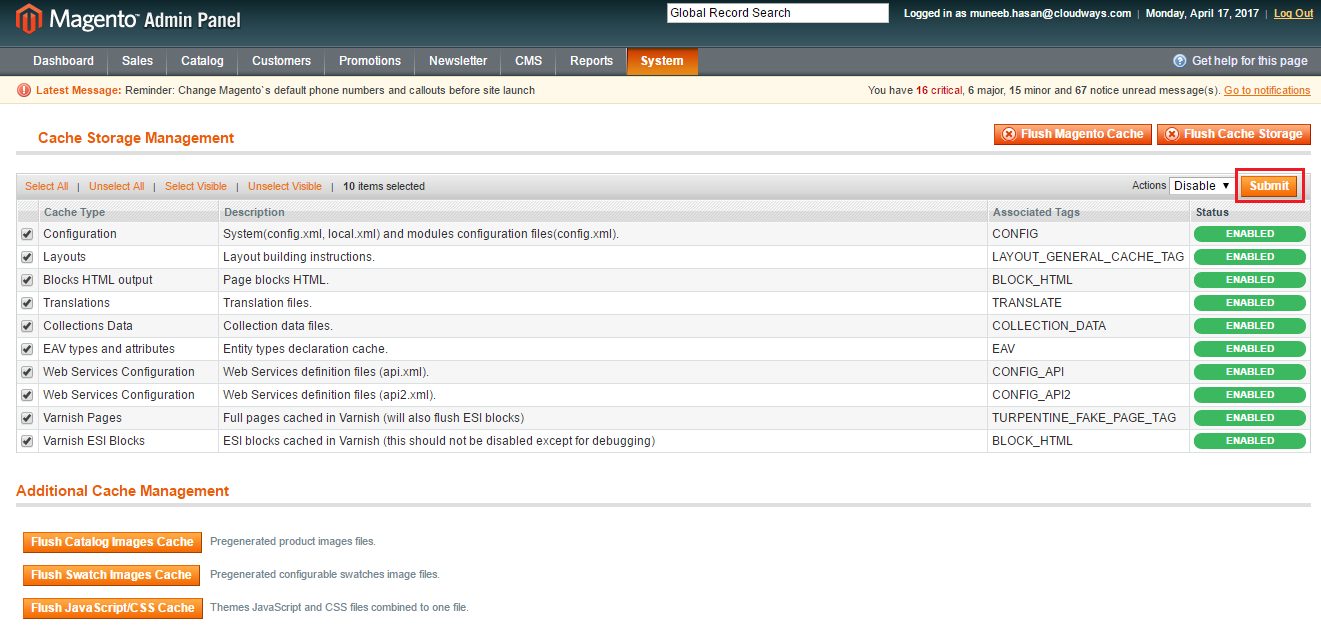
Step 1: Disable Cache
Open the admin panel and go to System → Cache Management
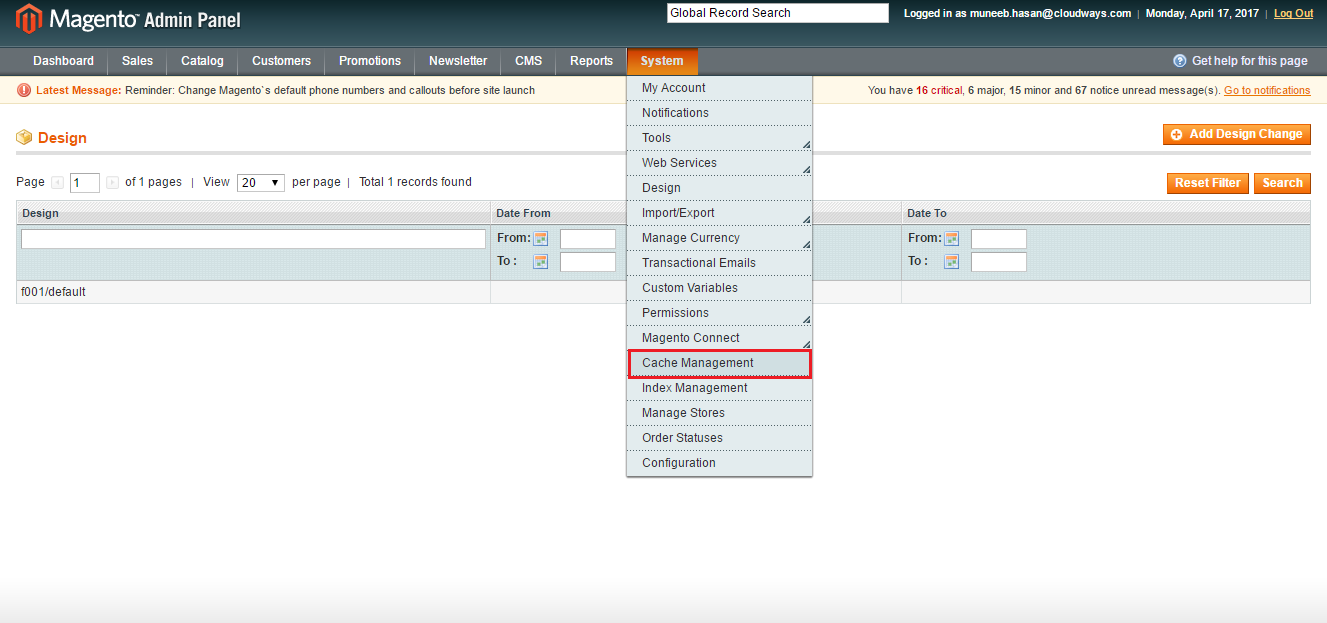
Select All from the list, select the Disable option from the dropdown menu, and just click on Submit.
Step 2: Getting the Magento Theme Extension Key
First, you need to select a theme that you wish to install on your Magento store. Once you’re sure of the theme that you want, click on Install Now.
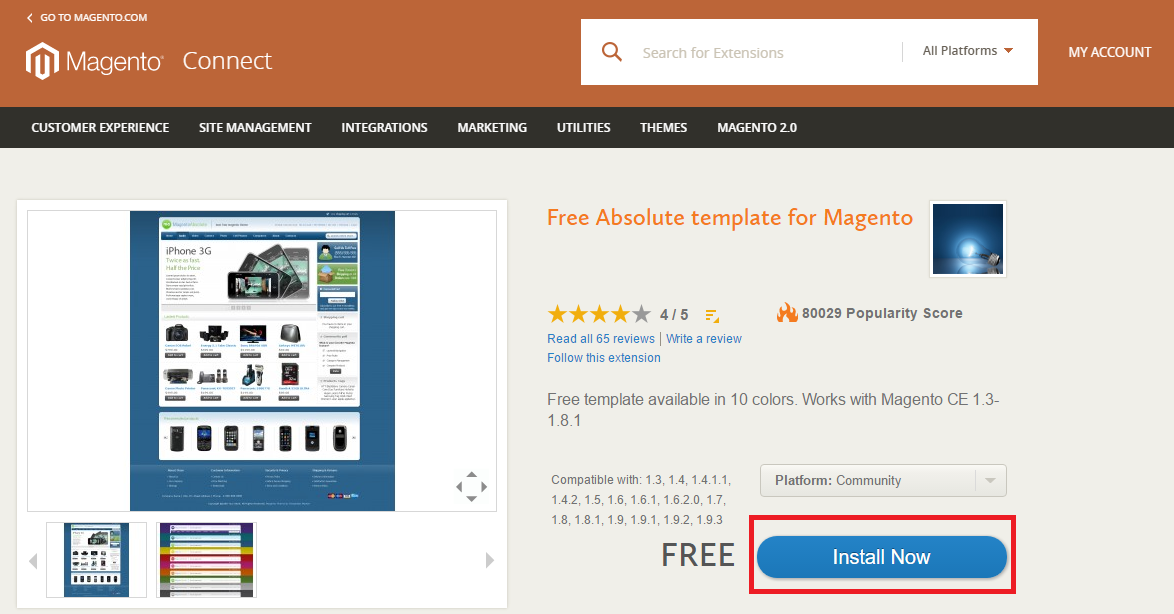
At this moment, you will need to log into Magento Commerce, or if you do not have an ID yet, you can signup for free.
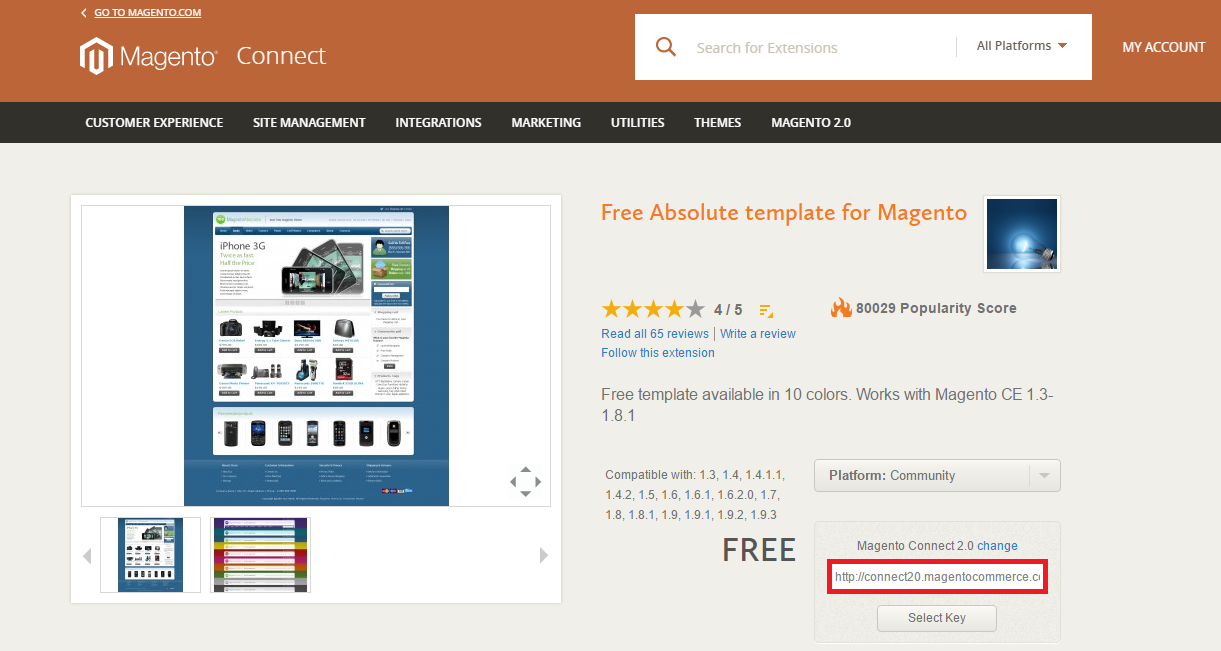
After signing in, select Magento Connect 2.0 (if you are using Magento 1.5 and above) and click Get Extension Key to copy the key.
Step 3: Installing Magento Theme via Magento Connect
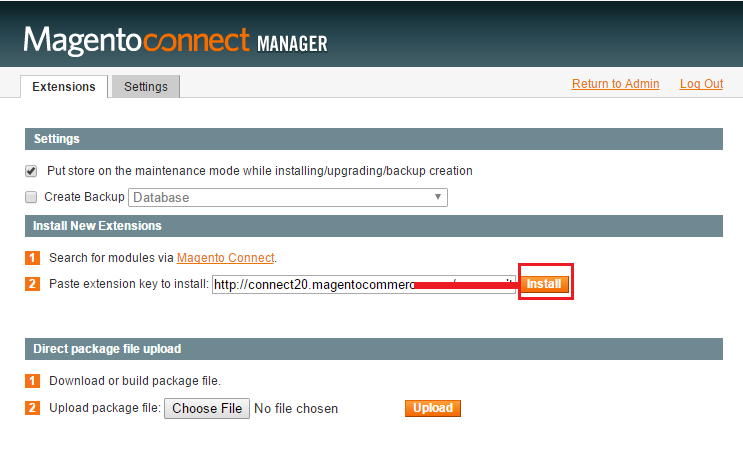
After you have copied the extension key, login to your Magento store admin and navigate to System -> Magento Connect -> Magento Connect Manager. Login to your Magento Connect account and then paste the extension key in the field and click on “Install” as shown in the image below.
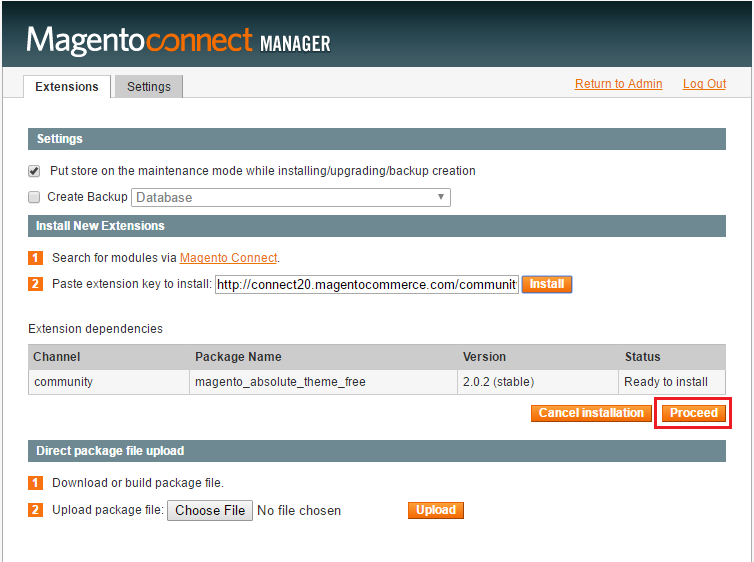
Now just click on Proceed.
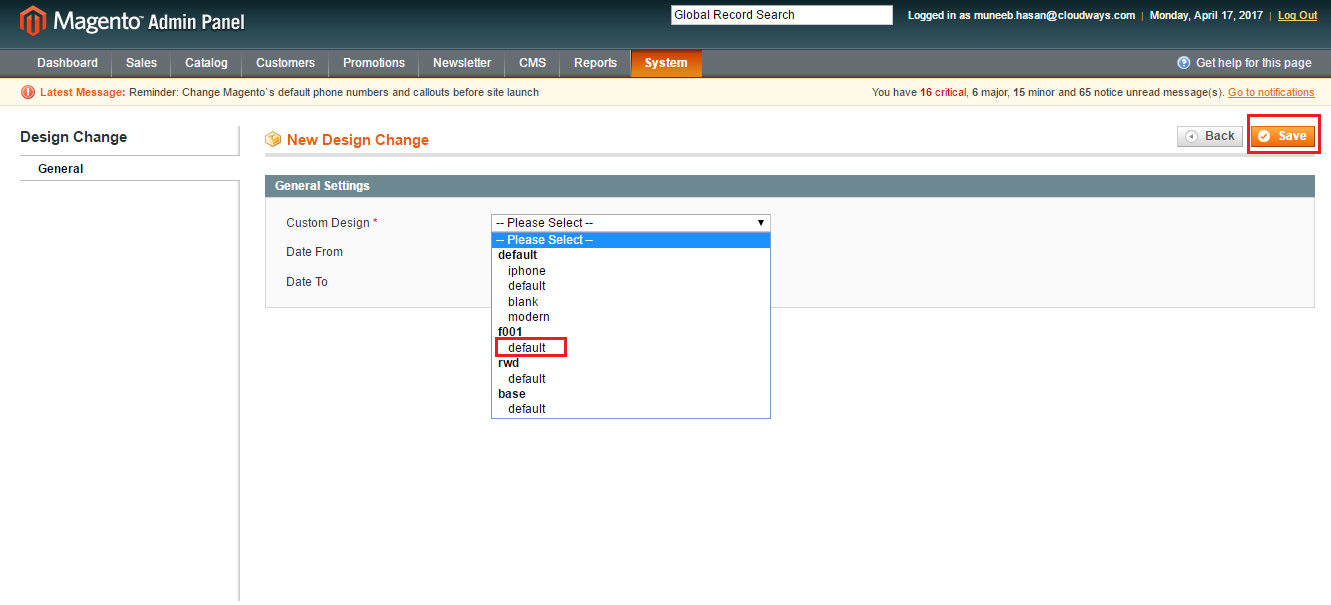
Step 4: Activating Magento 1 Theme
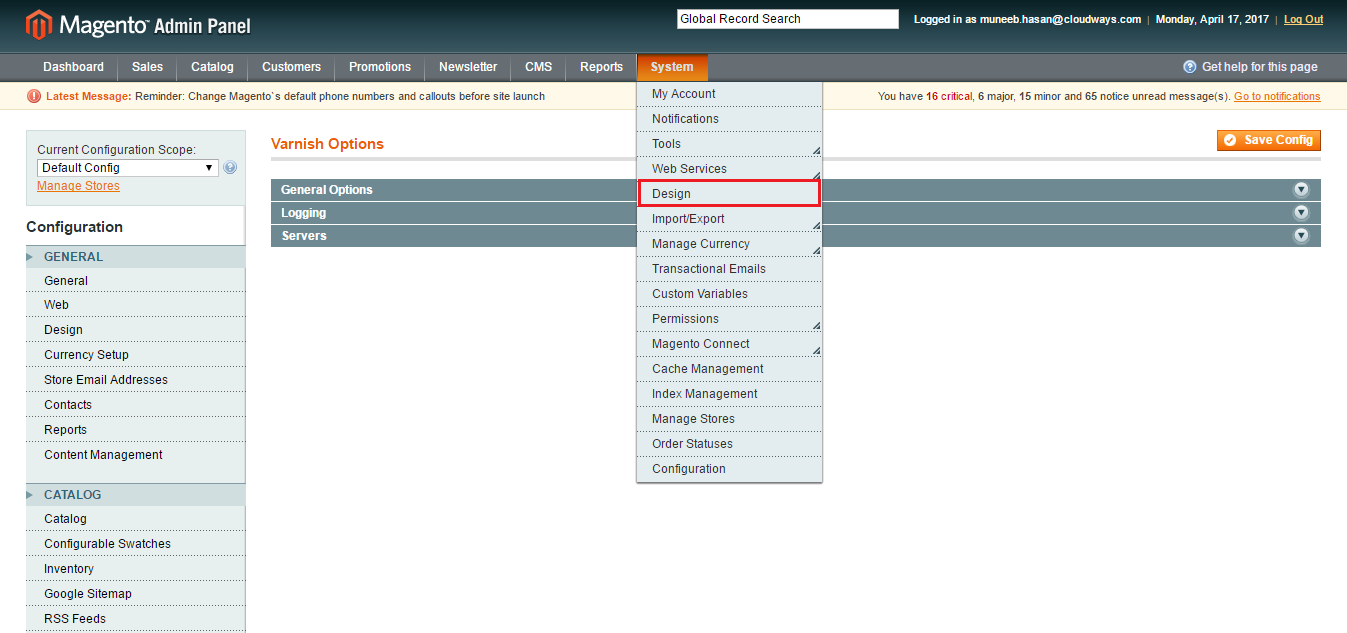
Once the installation is successful, head back to your Magento admin and navigate to System -> Design
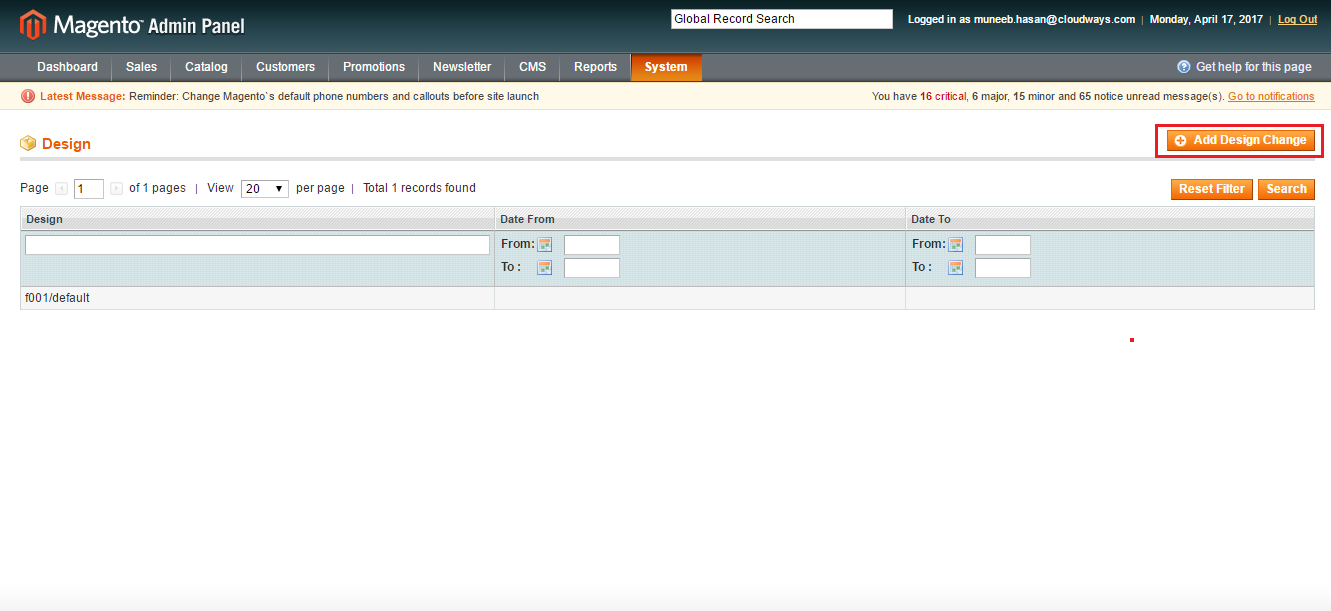
Now click on Add Design Change.
Select the theme from the dropdown menu and click on Save.
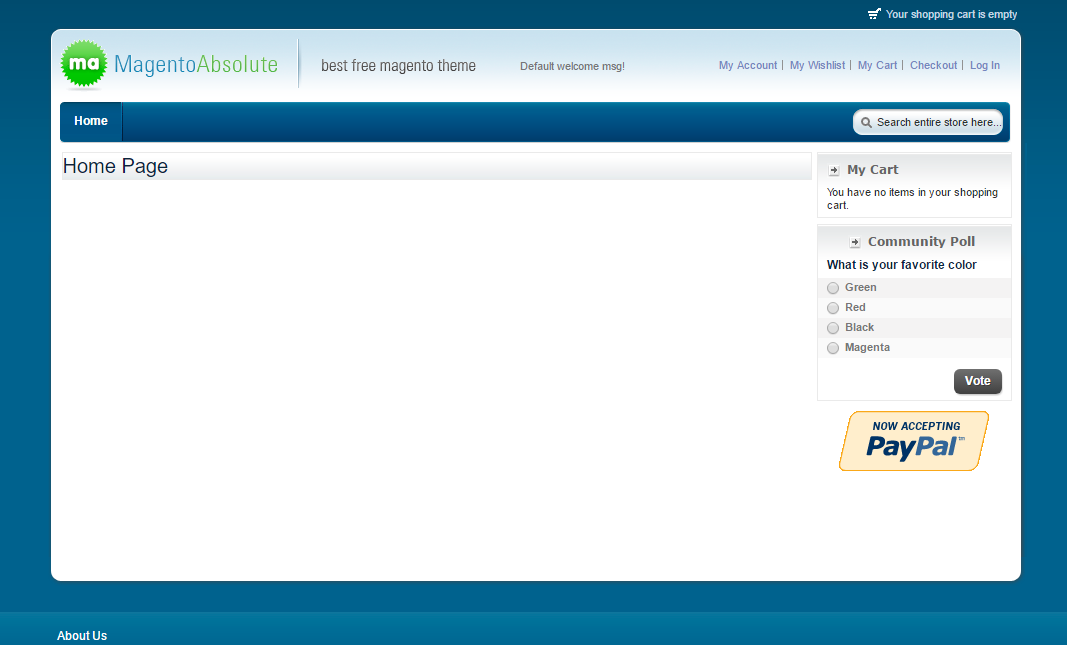
And you’re done! Open your store’s homepage and you will see the result:
This is it for now. Now you know how to install a Magento theme manually. If you run into any problems while installing a theme or while configuring it, feel free to ask in the comments section below.