<config>
<modules>
<Cloudways_Qty>
<version>0.1.0</version>
</Cloudways_Qty>
</modules>
<global>
<models>
<grouped>
<class>Cloudways_Qty__Model</class>
</grouped>
</models>
<blocks>
<grouped>
<class>Cloudways_Qty_Blocks</class>
</grouped>
</blocks>
</global>
<frontend>
<events>
<core_block_abstract_to_html_after>
<observers>
<cloudways_grouped_init>
<class>Cloudways_Qty_Model_Observer</class>
<method>applyJavascript</method>
</cloudways_grouped_init>
</observers>
</core_block_abstract_to_html_after>
</events>
</frontend>
</config>
<config>
<modules>
<Cloudways_Qty>
<active>true</active>
<codePool>local</codePool>
</Cloudways_Qty>
</modules>
</config>
<?php
class Cloudways_Qty_Model_Observer
{
const MODULE_NAME = 'Cloudways_Qty';
public function applyJavascript($observer = NULL)
{
if (!$observer)
{
return;
}
if ('product.info.addtocart' == $observer->getEvent()->getBlock()->getNameInLayout())
{
if (!Mage::getStoreConfig('advanced/modules_disable_output/'.self::MODULE_NAME))
{
$transport = $observer->getEvent()->getTransport();
$block = new Cloudways_Qty_Block_Injection();
$block->setPassingTransport($transport['html']);
$block->toHtml();
}
}
return $this;
}
}
<?php
class Cloudways_Qty_Block_Injection extends Mage_Core_Block_Text
{
protected $a = 'grouped.qty_javascript';
protected $b = 'qty_javascript';
public function setPassingTransport($transport)
{
$this->setData('text', $transport.$this->_generateJavaScript());
}
private function _generateJavaScript()
{
$directory = dirname(dirname(__FILE__));
$File = 'quantity.phtml';
$template = 'template';
return file_get_contents($directory . DS . $template . DS . $File);
}
}
<script type="text/javascript">
var parentTD;
var newDiv;
var navigationDiv;
var i = 1;
var currentElement = null;
$$('input.qty').each(function(el)
{
parentTD = el.parentNode;
newDiv = document.createElement('div');
Element.extend(newDiv);
newDiv.id = i++;
newDiv.update(parentTD.innerHTML).innerHTML;
parentTD.update().innerHTML;
parentTD.appendChild(newDiv);
navigationDiv = document.createElement('div');
Element.extend(navigationDiv);
navigationDiv.update('<p class="add">+</p><p class="sub">-</p>').innerHTML;
newDiv.appendChild(navigationDiv);
});
$$('p.add').each(function(el)
{
el.observe('click',function(event)
{
currentElement = el.parentNode.previous();
i = 0;
while(currentElement.type != 'text' && i < 5)
{
currentElement = currentElement.previous();
i++;
}
currentElement.value = parseInt(currentElement.value) + 1;
});
});
$$('p.sub').each(function(el)
{
el.observe('click',function(event)
{
currentElement = el.parentNode.previous();
i = 0;
while(currentElement.type != 'text' && i < 5)
{
currentElement = currentElement.previous();
i++;
}
if(parseInt(currentElement.value) > 0){
currentElement.value = parseInt(currentElement.value) - 1;
}
});
});
</script> .add
{
color: #3399cc;
font-weight: bold;
font-size: 20px;
text-align: center;
margin-left: 46px;
cursor: pointer;
position: absolute;
margin-top: -34px;
}
.sub
{
color: #3399cc;
font-weight: bold;
font-size: 20px;
text-align: center;
margin-left: 32px;
cursor: pointer;
} Now, to execute your custom css file, go to app/design/frontend/your-theme/default/layout/page.xml and place following code before </default>: <reference name="head">
<action method="addItem"><type>skin_css</type><file>css/custom.css</file></action>
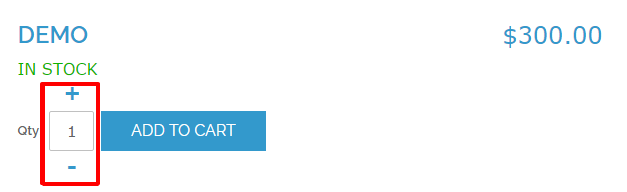
</reference> Go to your product page now and you will see the result. What Is Managed Web Hosting? Managed web hosting is like hiring a concierge for your… Read More
Your greatest possible competitive advantage can be your clients and the interactions they have with… Read More
Digital marketing KPIs are measurable values that marketing teams use to track progress toward desired… Read More
In today's digital age, fraud poses a significant threat to businesses of all sizes. As… Read More
Financial crimes continue to evolve and proliferate in our increasingly digital, global economy. From complex… Read More
In the highly competitive modern workplace, trust, and employee loyalty are crucial factors for long-term… Read More
View Comments
Hi,
Please help me to resolve this error "Mage registry key "_singleton/Cloudways_Qty_Model_Observer" already exists". Thanks
This may be caused due to cache, are you sure it's cleared? If not, please clean your cache. After that disable your Magento compiler and enable it and re run the compilation again.
hi,
i want that quantity selector in wherever add to cart button appears. how to do that?
Hello,
Can you please elaborate your query. Thanks
Hi Muneeb,
Thank you for these instructions. They worked great for me with only some stylistic adjustments. Allow me a question please: why are the increment buttons not being enabled also in the shopping basket?
Thanks for your appreciation. Well in this guide I have shown the method only to add increment and decrement quantity button in Magento 2 product page.
Thank you for your reply! Actually I can confirm that the Module also works on Magento 1.9! It also works by the way on the grouped product page, it only needs different CSS-styles.
bro i need your help